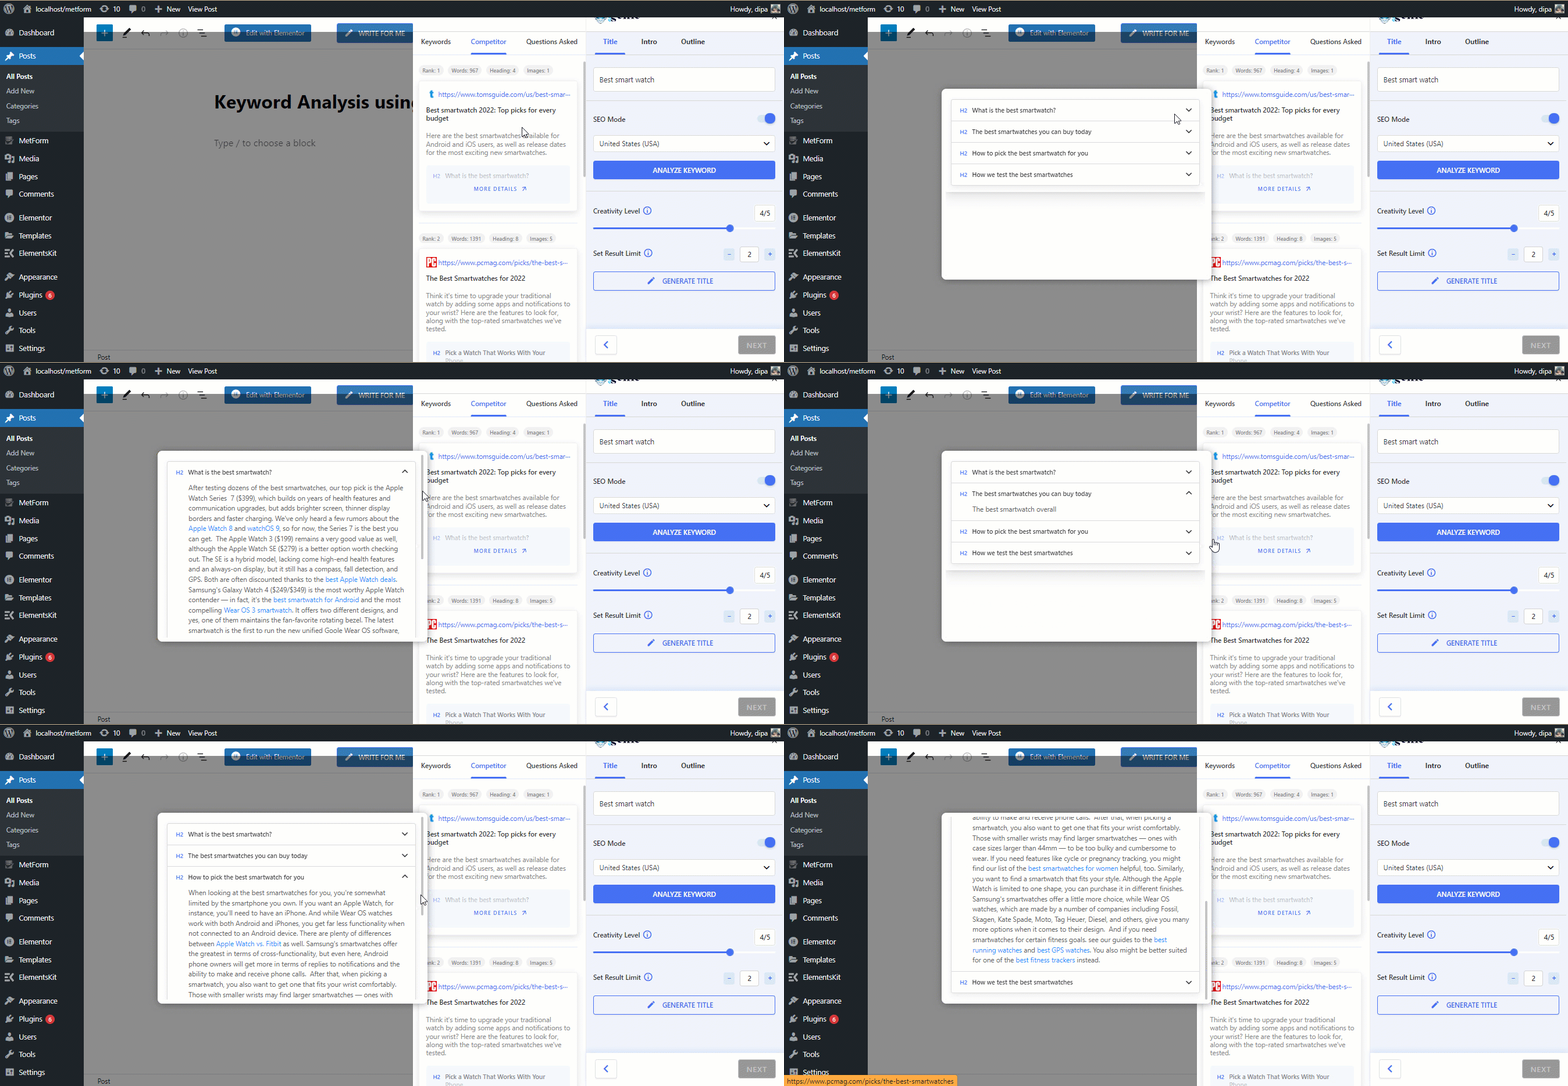
With the Competitor Analysis feature of GetGenie AI, you can find the list of top-ranked blogs/ webpages for a specific keyword. The information you will find with the competitor feature include
- Rank
- Words
- Heading (number of heading)
- Images (number of images)
Moreover, you can also check all the heading and their description with few a clicks.
Note: If you need help installing and activating GetGenie AI, check this documentation.
How to do Competitor Analysis for any blog using GetGenie AI #
Competitor Analysis is a simple task with GetGenie AI. Let’s have a look at the whole process:
Step 1: Create a new post #
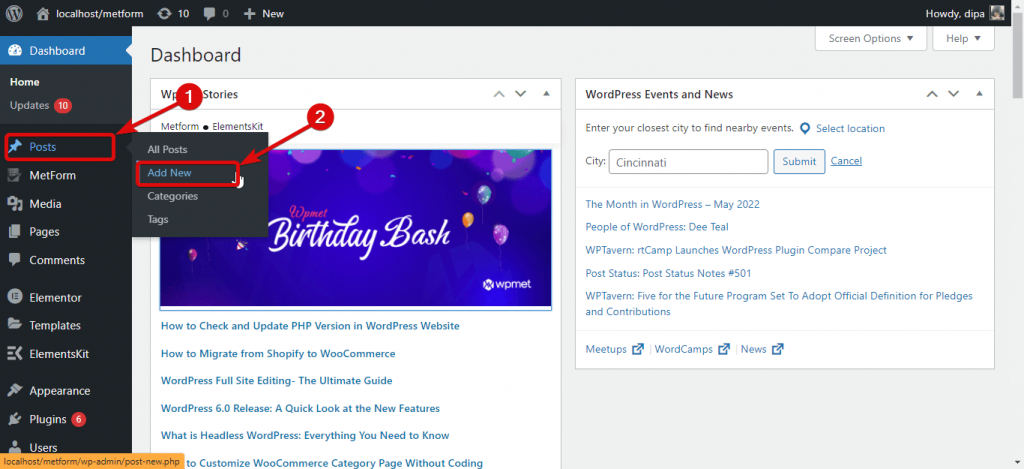
Go to WordPress Dashboard ⇒ Posts then click on Add New to create a new post.
Step 2: Turn on SEO Mode #
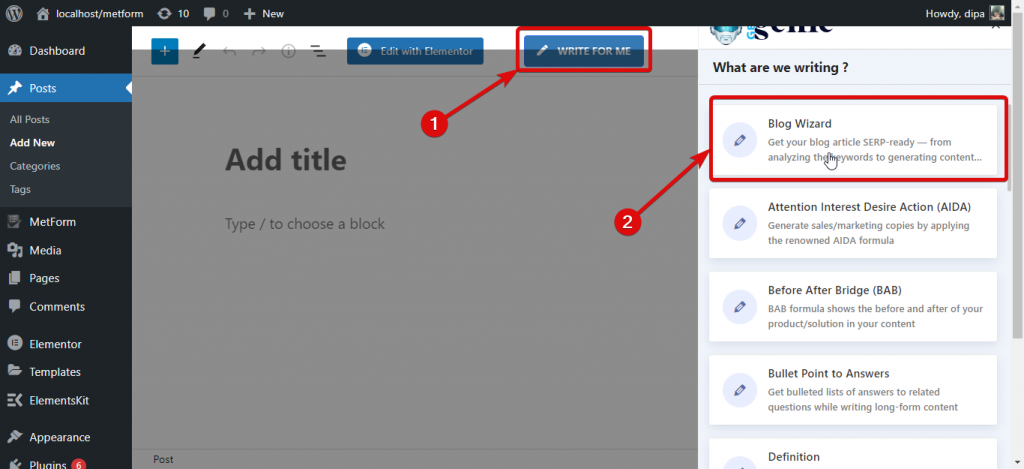
Once you are on the new post page, you need to turn on the SEO Mode. For that, click on the “Write For Me” and then go to Blog Wizard.
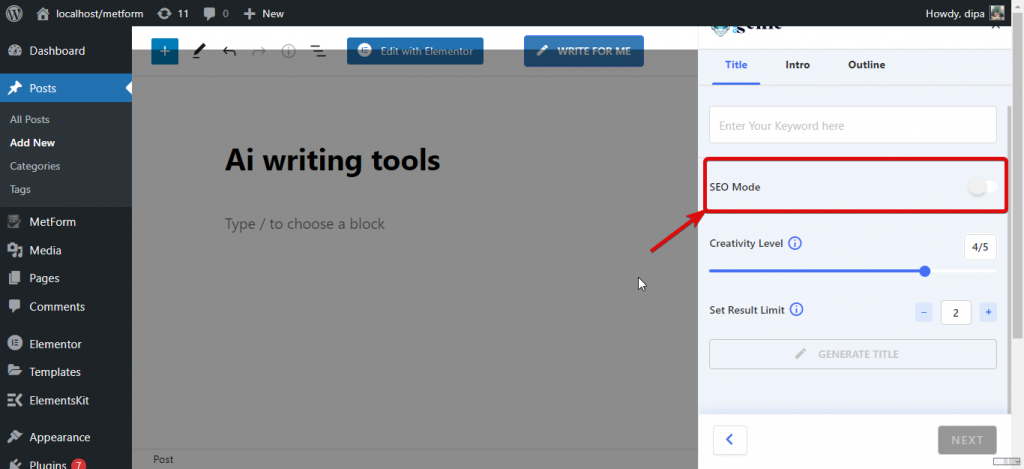
Now turn on the SEO Mode option.
Step 3: Do Competitor Analysis #
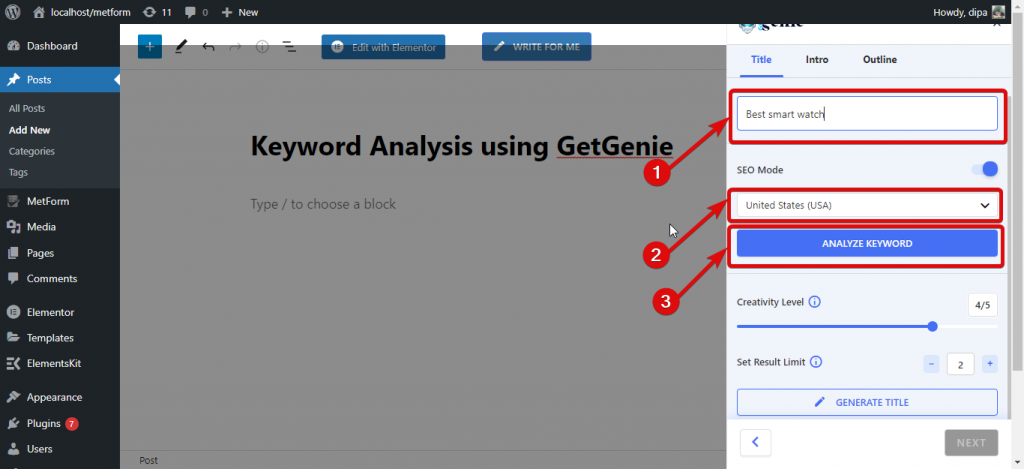
Now to analyze a keyword, provide a keyword, then select the country from the dropdown, and finally, click on the Analyze Keyword Button.
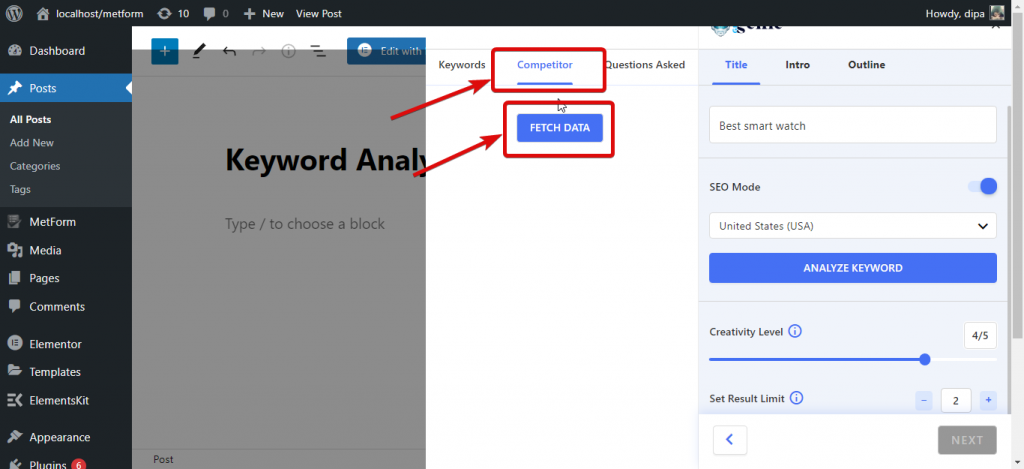
Now you will see an extended window. After that, navigate to the Competitor tab and click on Fetch Data.
After some research, it will display the top blogs raked for the keyword provided.
Fetching data may take a while. Therefore, you can use other features while the Genie is fetching data and then come back to the tab when data fetching is done.
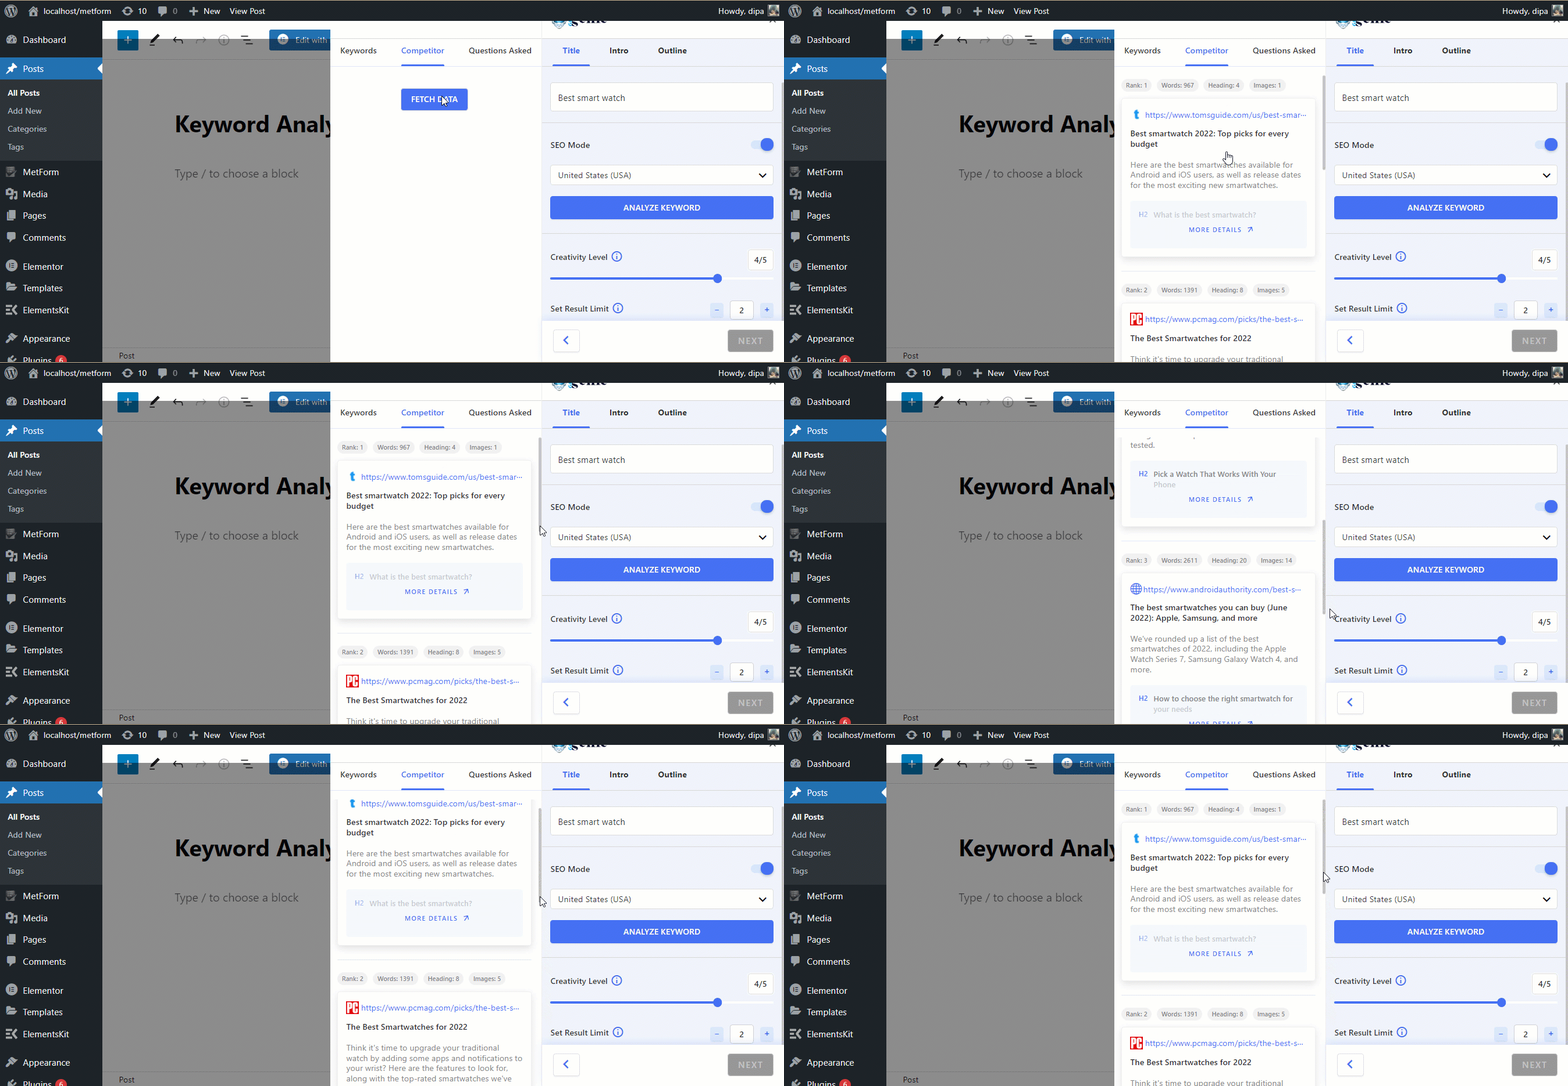
You can click on each of the blogs to see the outline/heading of that blog. In case you want to see the content of the heading, just click to expand the tab.
