The blog wizard feature of GetGenie AI allows you to write a complete blog. With this feature, you can generate an intro for your blog, an outline, and also add content/description for each heading of your outline. Plus, you can write an entire blog post using the One-click blog feature.
The good thing about this is that you can generate multiple options for your title, intro, and outline with the GetGenie AI blog wizard. Moreover, if you don’t like any section, you can just select and rewrite it in simple steps.
How to write a blog using the GetGenie AI Blog Wizard #
Writing an article using the GetGenie AI blog Wizard is super easy and quick. Follow the below-mentioned steps to generate a blog within a few minutes.
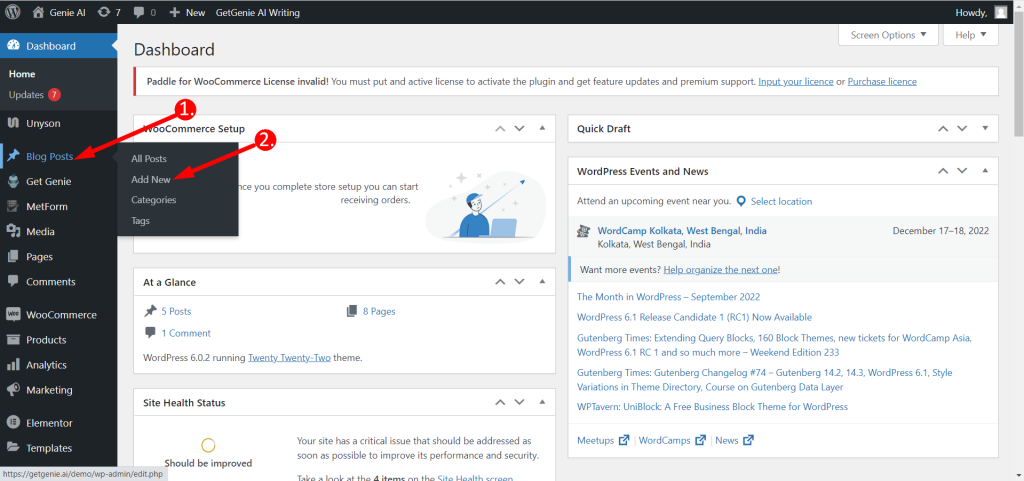
Step 1: Create a New Post #
Go to WordPress Dashboard ⇒ Posts then click on Add New to create a new post.
Step 2: Go to Blog Wizard #
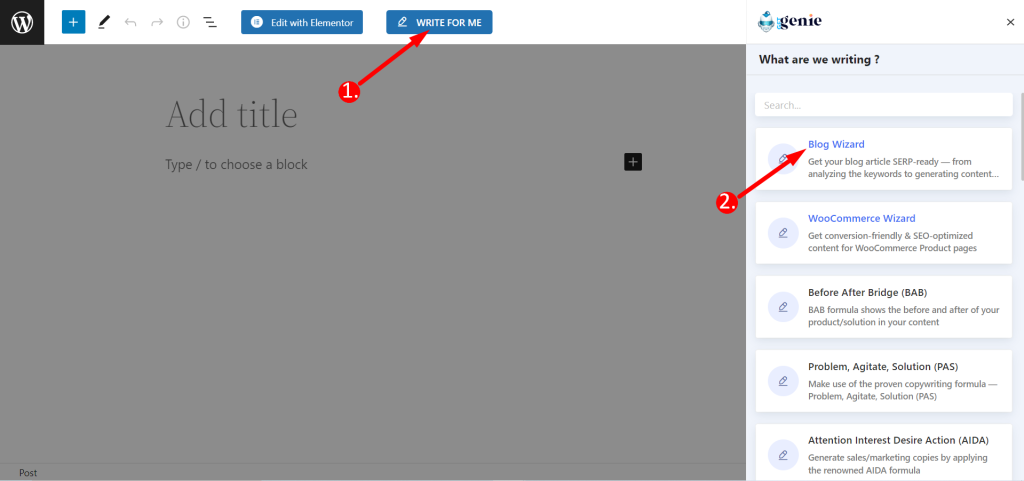
To write an article using the blog wizard feature,
- Click on the “Write For Me” button
- Choose the “Blog Wizard” template
Note: This template is available on both WordPress and Playground of GetGenie AI.
Step 3: Generate Blog Title #
To generate blog titles, follow the following steps:
- Write the keyword in the text box
- Select one among 33 languages
- Turn on the “SEO mode” for keyword research, and head-to-head competition analysis
- Choose the region e.g. Global, US as per your targeted audiences
- Check out this documentation to do keyword analysis using GetGenie AI
- If you want, write the context related to your keyword in the Context (Optional) field
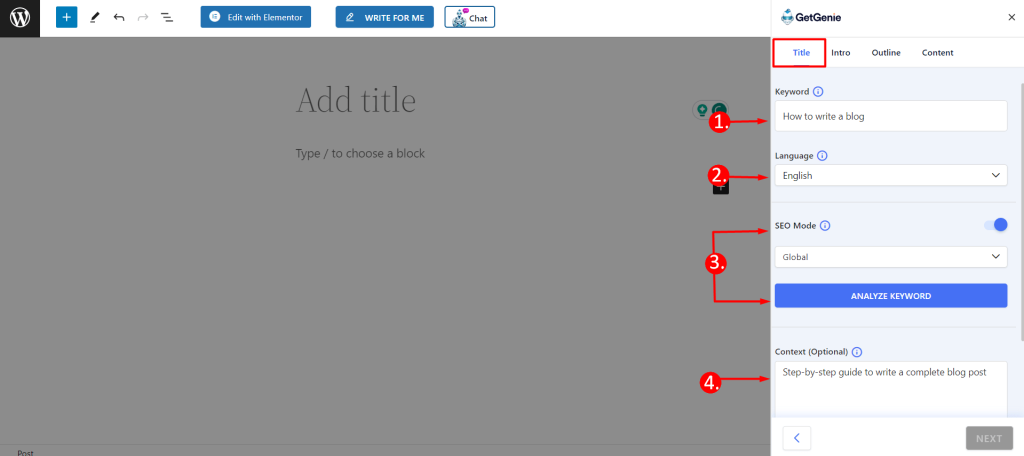
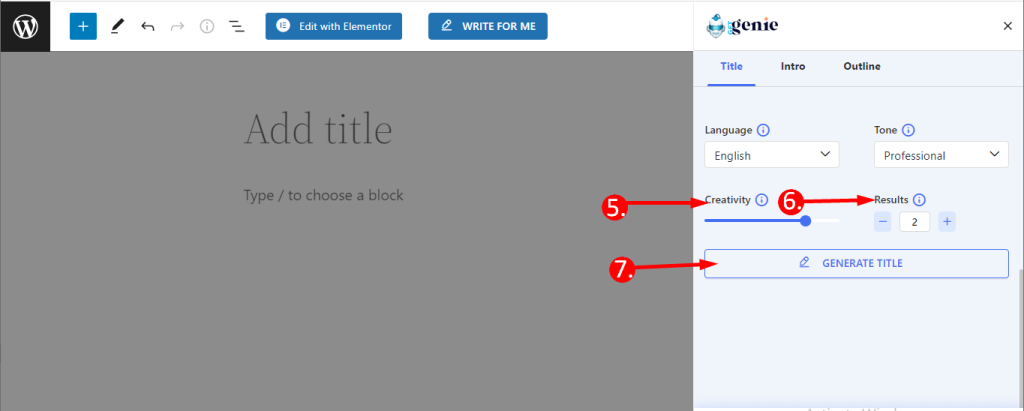
- Next, select the creativity level (out of 5)
- Select the number of results (out of 6) you want
- Click on “Generate Title” to produce the number of titles you want
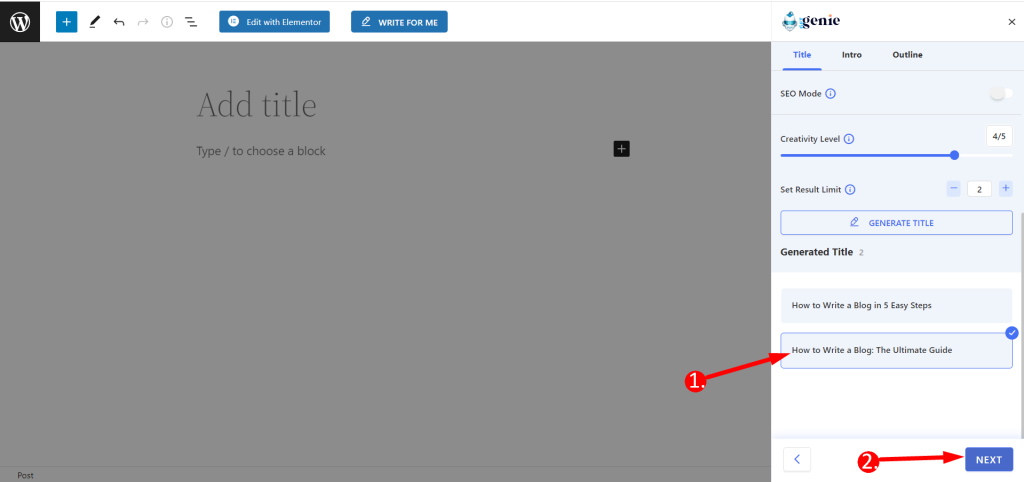
Once titles have been produced, click to select the one you like. Then click on the “Next” button.
Step 4: Generate Intro #
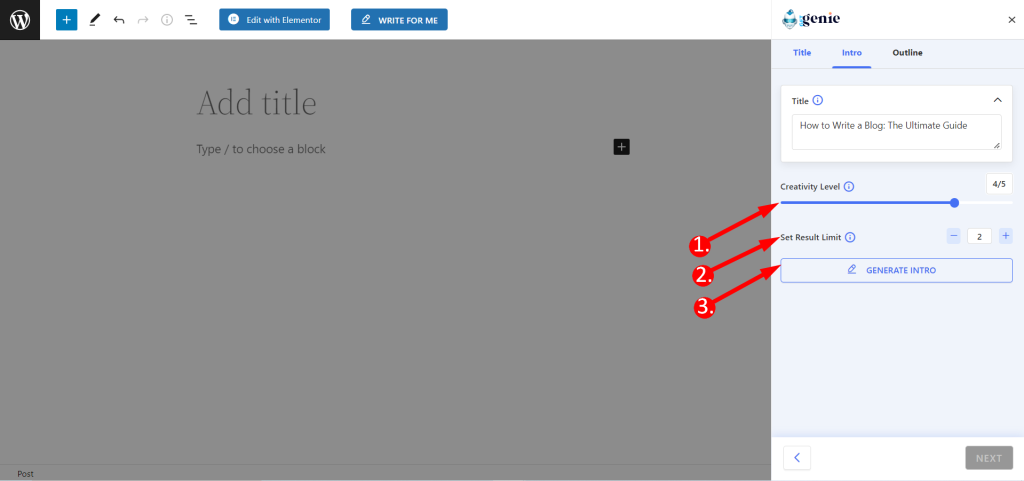
- Now choose the Creativity level and Set Result Count or keep it as before
- After that, click on “Generate Intro” to produce blog intro options
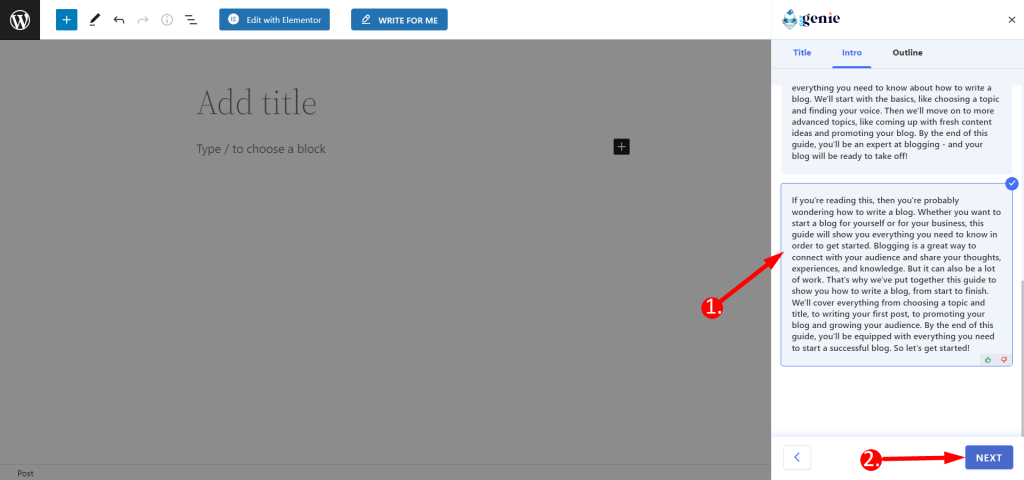
Now, click to select the intro you like, then click on the “Next” button.
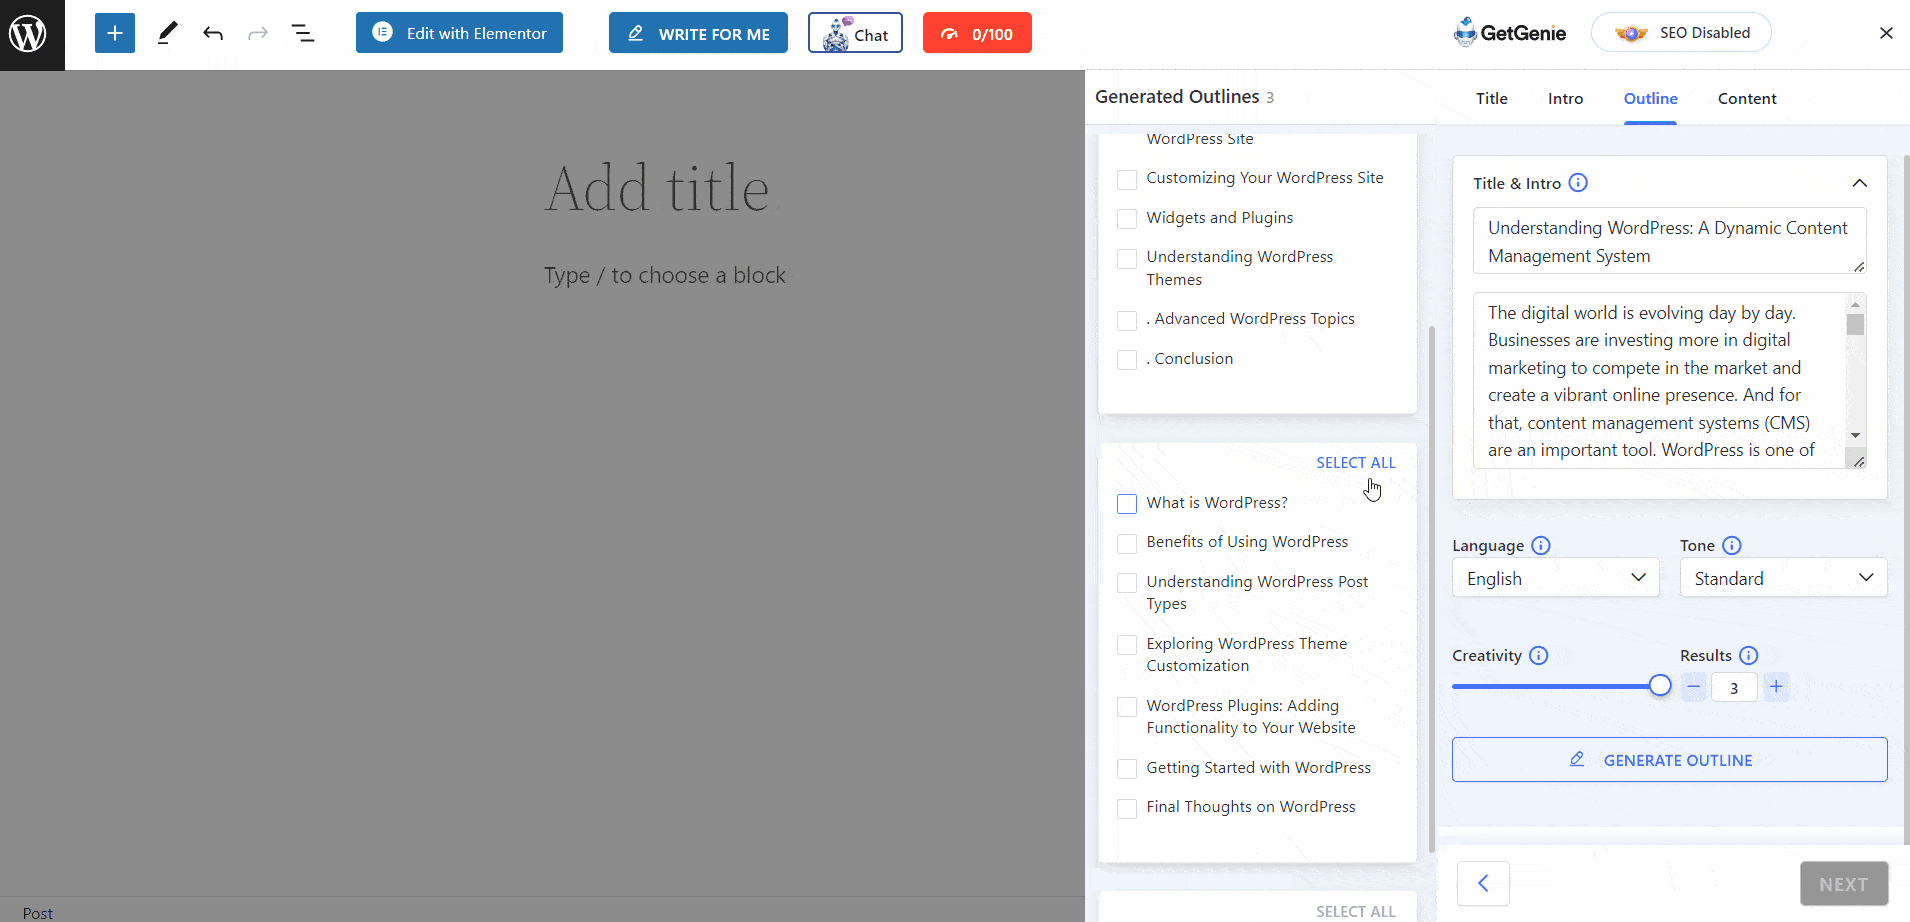
Step 5: Generate Blog outline #
Time to generate the blog outline,
- Select the creativity and number of results you want.
- Click on “Generate Outline”
- You can see the generated outlines and choose the points you like to make your blog outline
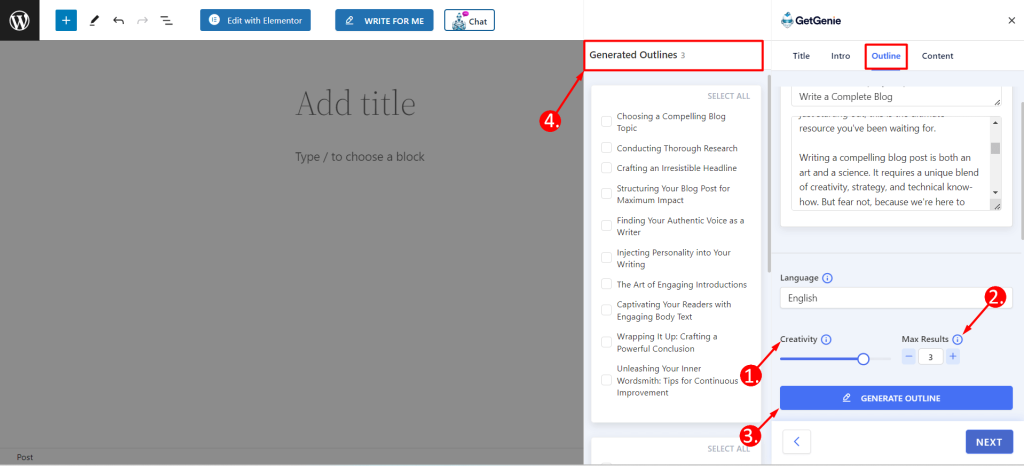
You can select any heading from any of your generated results.
- To select the whole outline, click on “Select All“
- To select an individual complete outline, click on the individual check box option
- On the other hand, you can also manually add outline points to your outline by clicking “Add Outline“
- Also, you can swap/edit/delete any heading if needed
- Finally, click on “Next” to add the outline to your blog
Step 6: Generate and Insert Blog Content #
A small window will pop up after clicking on the next button. Here, you can see 2 options for “One-click blog” and “Customized Content”.
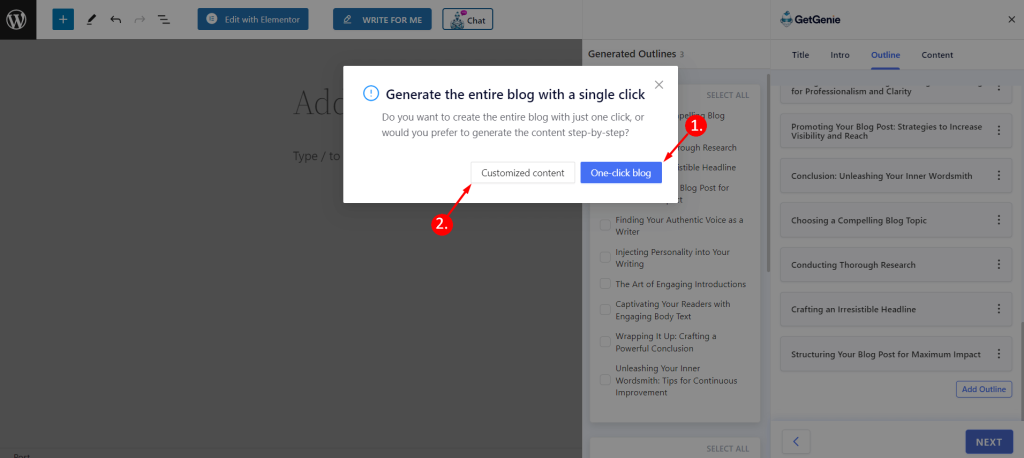
👉 One-Click blog generation: To write an entire blog content using the “One-click blog” feature of the blog wizard, check out this documentation.
👉 Generate Customized Content: To write customized content for each heading in the blog wizard,
- Click on the “Customized Content” option
- You can see all the individual headings here
- Click on the “Instructions or Keywords” option to add custom keywords and context
- Write or select from the suggested keywords
- Enter the context (optional)
- Click on “Generate” and it will be added to your blog post
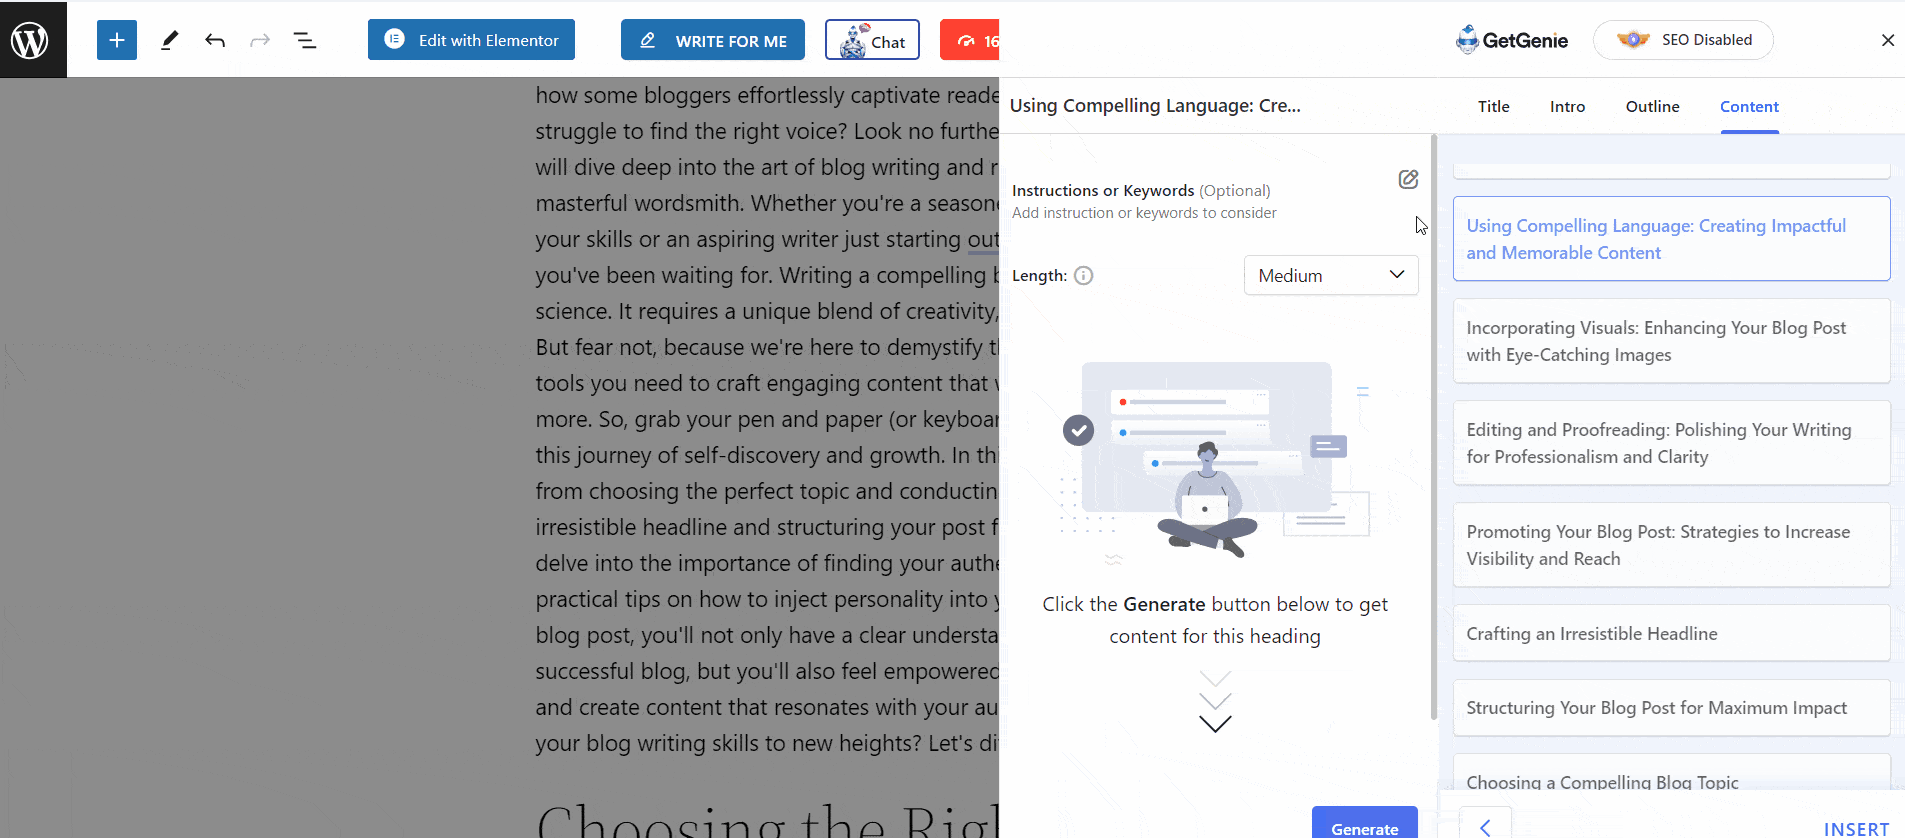
- Next, mark one heading and select the output size e.g. small, medium, and large
- Click on “Generate”
- Next, click on “Continue” or “Regenerate” if you’re not satisfied with the output
- Repeat the same process for all headings and then click on “Insert”
- The entire blog post will be inserted into the WordPress block editor

Step 7: Customize and Publish #
Now you have a blog, you can edit and customize it just like you would with a blog that was written by a human.
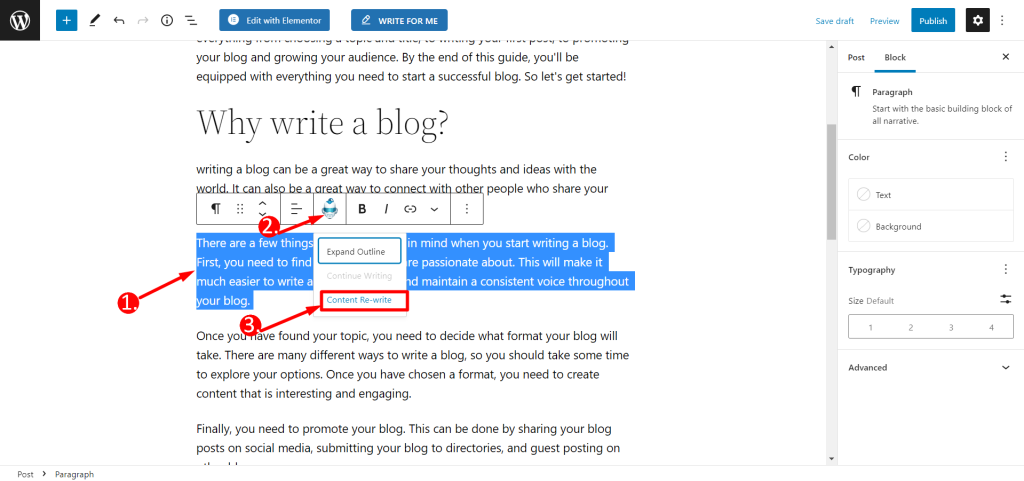
For example, if you don’t like any section, you can rewrite it inside the WordPress block editor. To rewrite,
- Select the paragraph, then click on the GetGenie AI icon
- Choose “Content Rewrite from the dropdown
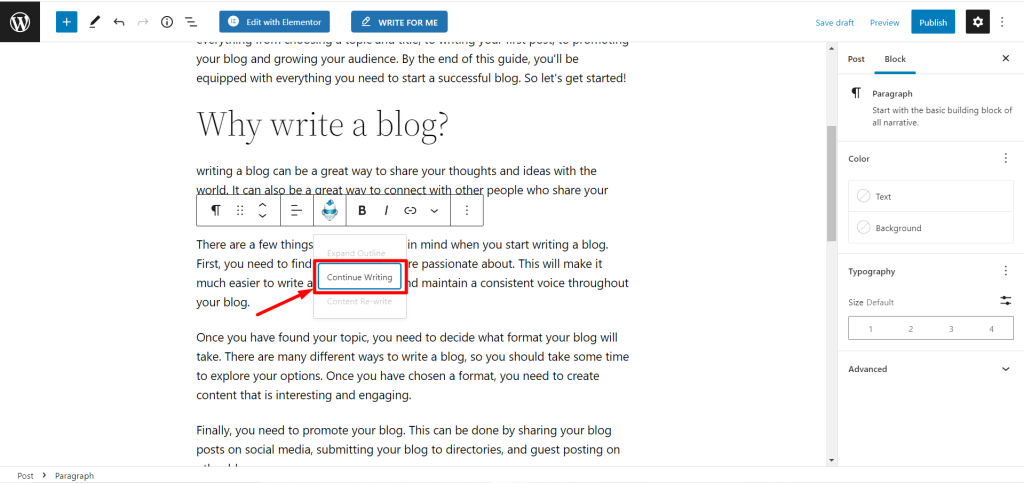
If you want to add a new paragraph, then just put the cursor at the end that paragraph. Once the GetGenie AI icon is visible, click on Continue Writing.
- You can add images with Genie AI Image in your blog post
- Finally, once you are happy with your blog, click on “Publish” to save
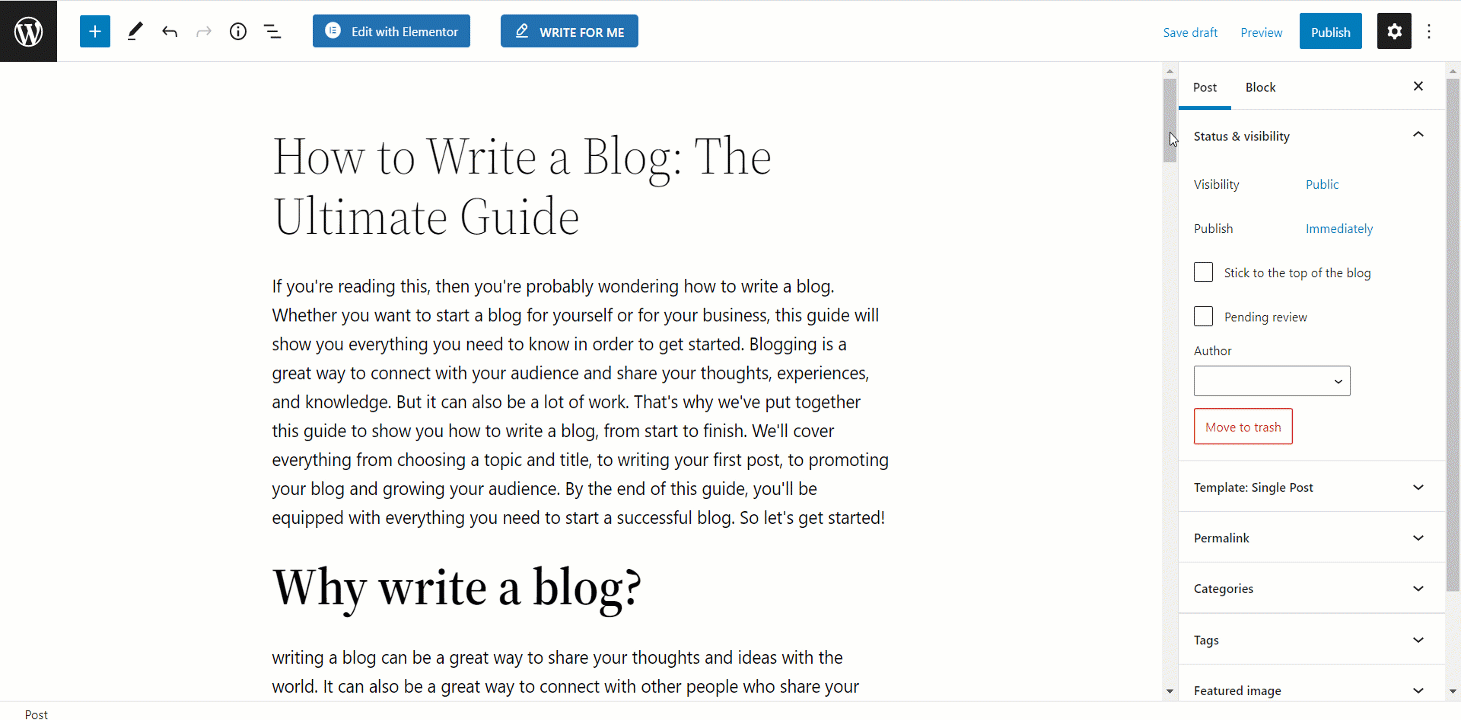
Here is a preview of the blog I wrote using GetGenie AI Blog Wizard for the purpose of this documentation: