The Genie Image WordPress plugin allows you to generate realistic images from the text descriptions you provide. This powerful text-to-image AI generative technology minimizes the need for any human involvement in image creation. Thus, it reduces design time and cost.
And, images are added directly to media files meaning you don’t have to upload them as well. Here’s how to install and activate the Genie Image plugin.
How to install and activate the Genie image plugin? #
Let’s see how to install the Genie Image plugin and activate it with the license key.
Plugin Installation: #

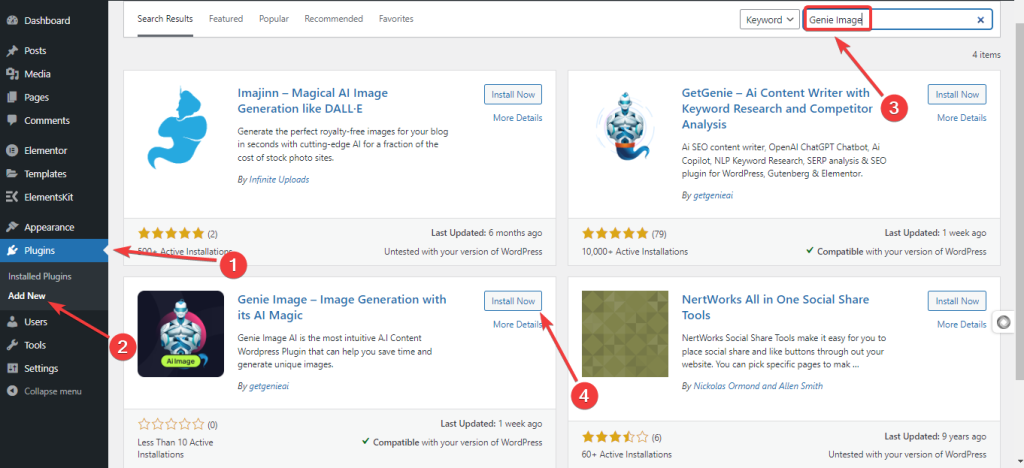
From your WordPress dashboard, navigate to Plugins > Add New > Search For “Genie Image” > Install & Activate it. And, you will see a new option labeled “Genie Images” on your site’s dashboard.
Note: If your WordPress site already has the GetGenie Ai plugin installed, there won’t be a new option added to your site. Further, you need to visit the GetGenie Ai > License settings to activate the plugin.
Licenses & Activation: #
To activate the license Genie Image plugin:

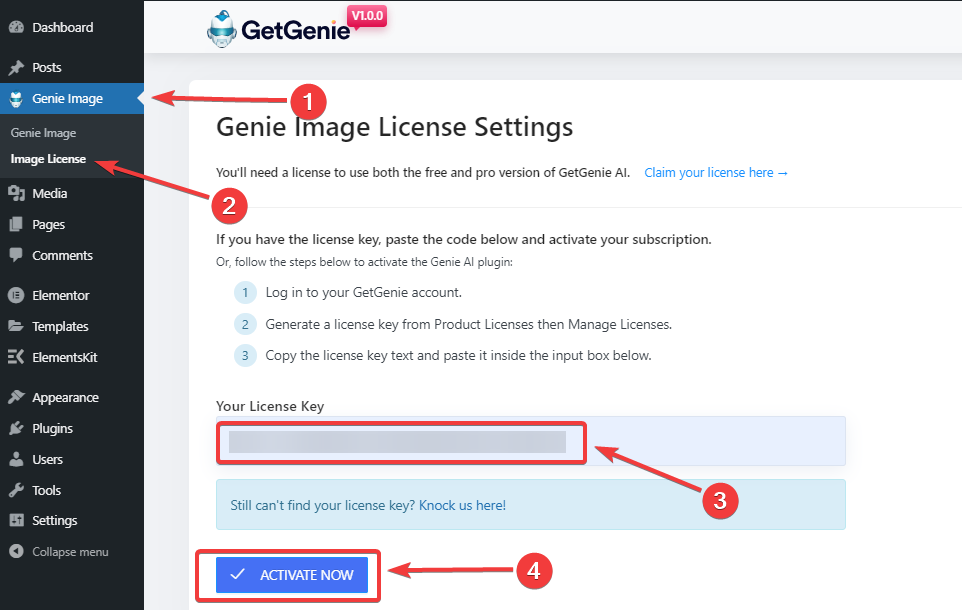
- Follow Genie Image > Image License.
- Enter the license key if you already have one.
- And, hit the “Activate Now” button.
- Now, if you don’t have the license key, find “Claim Your License Here” and click it. You will move to a page for getting your license key.
However, if the license key still doesn’t work, just knock us here.
Hopefully, now you know how to install and activate the Genie Image plugin.


