GetGenie Ai writing assistant comes with a brand new feature “One-click Blog” to simplify the entire process to write a complete blog post on the WordPress website.
This feature is integrated with the Blog Wizard template of GetGenie and the content generation process is almost similar. You can set properties for language, creativity level, and result. Then, generate titles, intro, and outlines using the blog wizard.
Before this one-click blog feature, you need to generate content for each heading separately. Now, you can write content for all headings with just one click to craft blog posts effortlessly.
👉👉 GetGenie – Download GetGenie
✔️✔️ See the documentation to install and activate the GetGenie Ai plugin
How to Write A Complete Blog Using GetGenie’s One-click Blog Feature #
Step 1: Select Blog Wizard Template and Generate Title #
To generate a blog post with the One-click blog feature, first, log into your WordPress dashboard. Then, click on “GetGenie Ai Writing” on the top bar. Or, create a new post and click on “Write for me”
- Select the “Blog Wizard” template
- Write the keyword and context (optional) of the keyword
- You can turn on the SEO mode and select the region for keyword analysis
- Select language (supports 33+ languages)
- Set the creativity level(up to 5) and the number of results you want (up to 6)
- Click on “Generate Title”
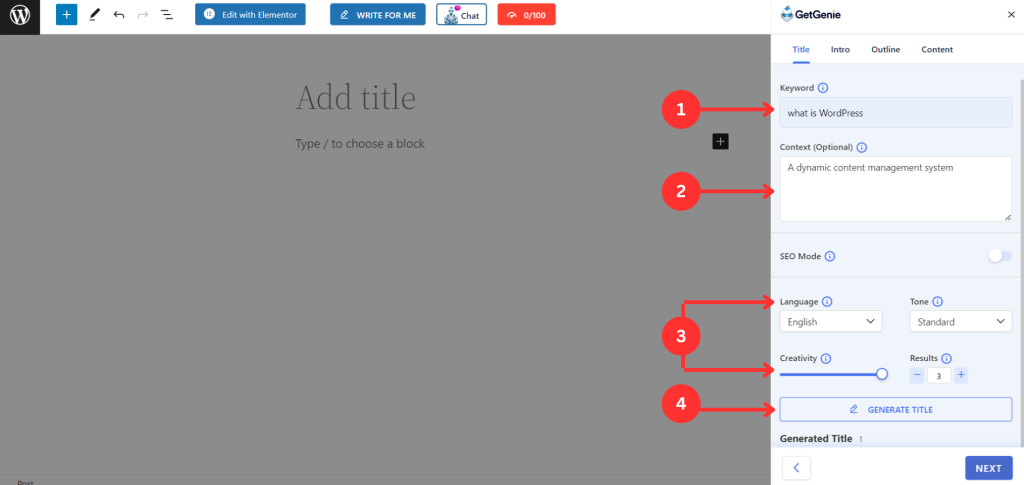
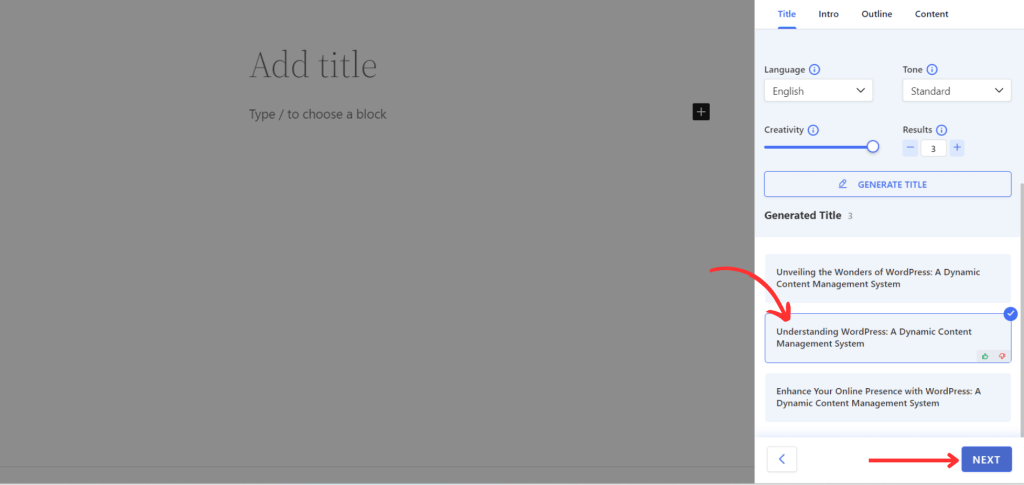
- It will generate the number of titles you wanted. Select the best one to proceed new step.
- Click on “Next”
Step 2 – Generate Intro and Outlines #
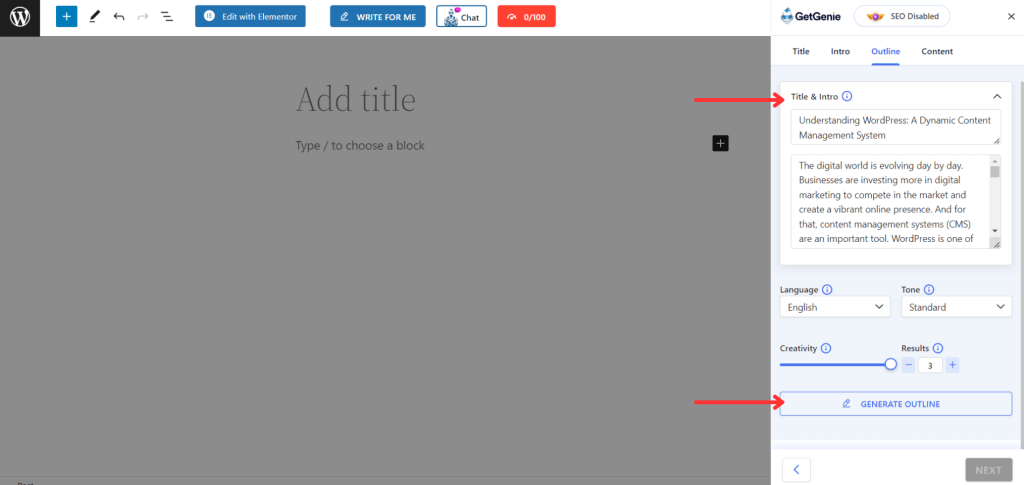
After choosing the title, you can again select the language, creativity, and results values, or keep it as it is.
- Click on “Generate Intro”
- Select the preferred one, click on “Next”
- Next, click on “Generate Outline”
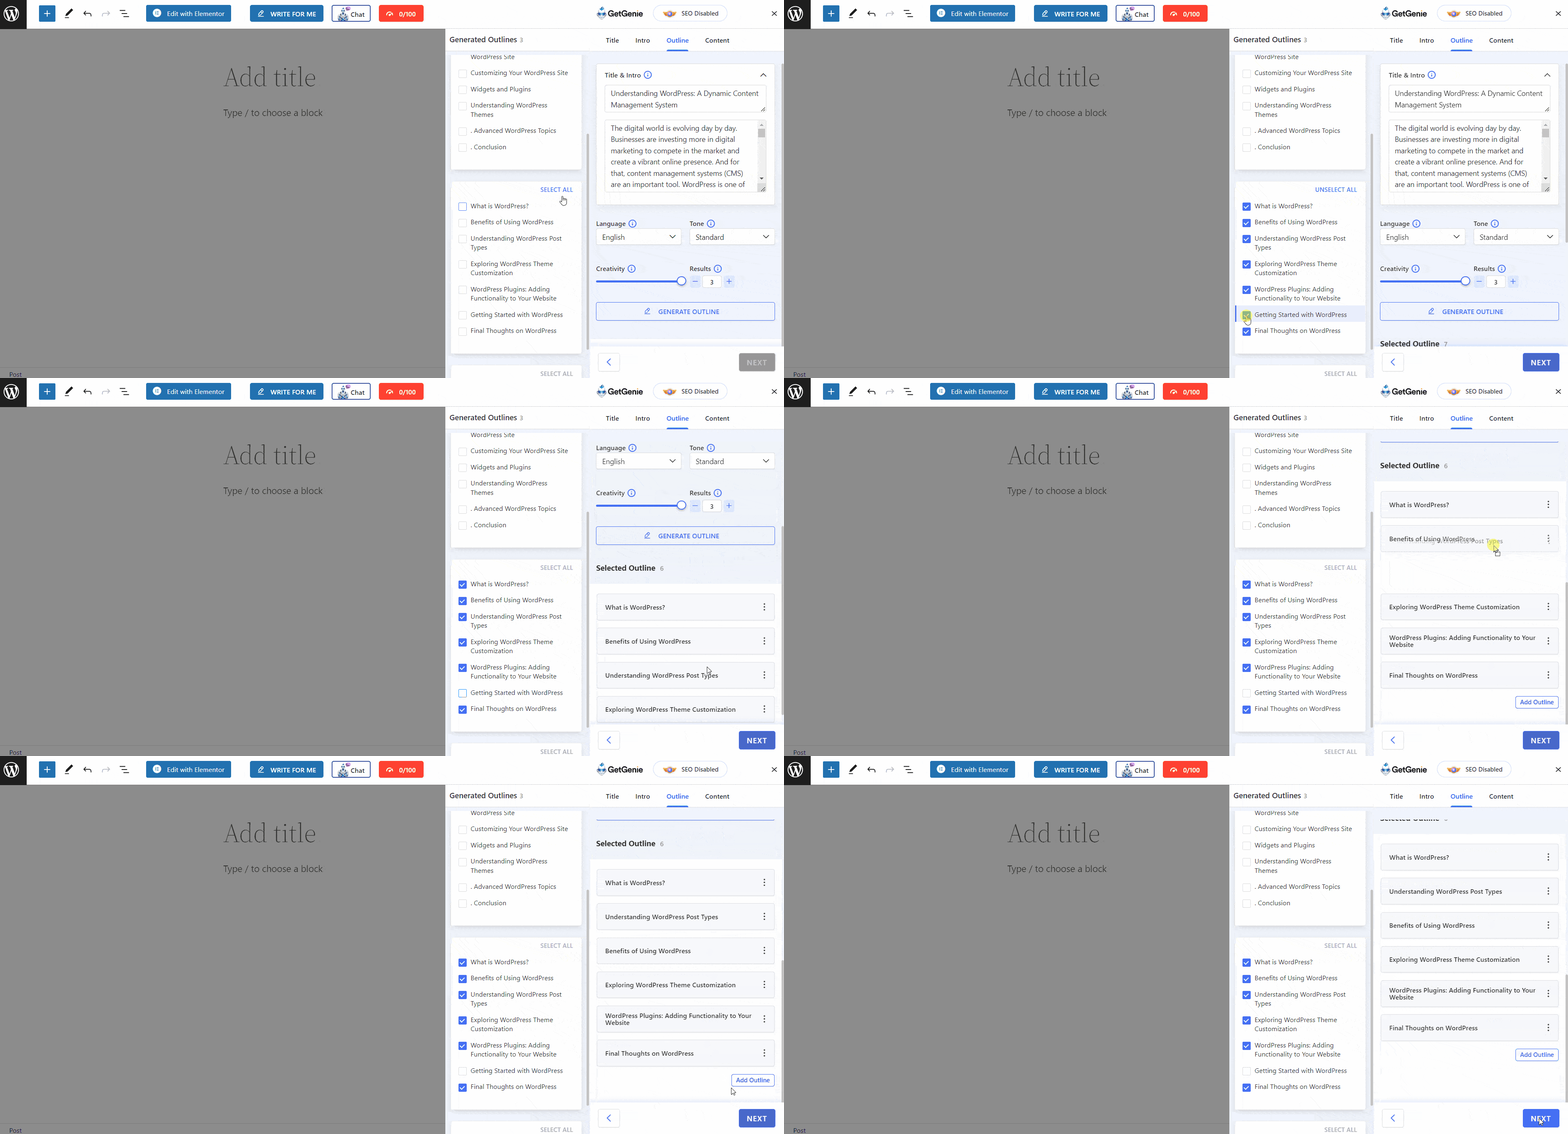
- All the headings will appear on the left side tab. You can select one by one, or select all by clicking on “Select all”. You can also change their order by swapping them.
- You can also add a custom heading manually on the “Add Outline” field
- Click on “Next”
Step 3 – Select the One-click Blog #
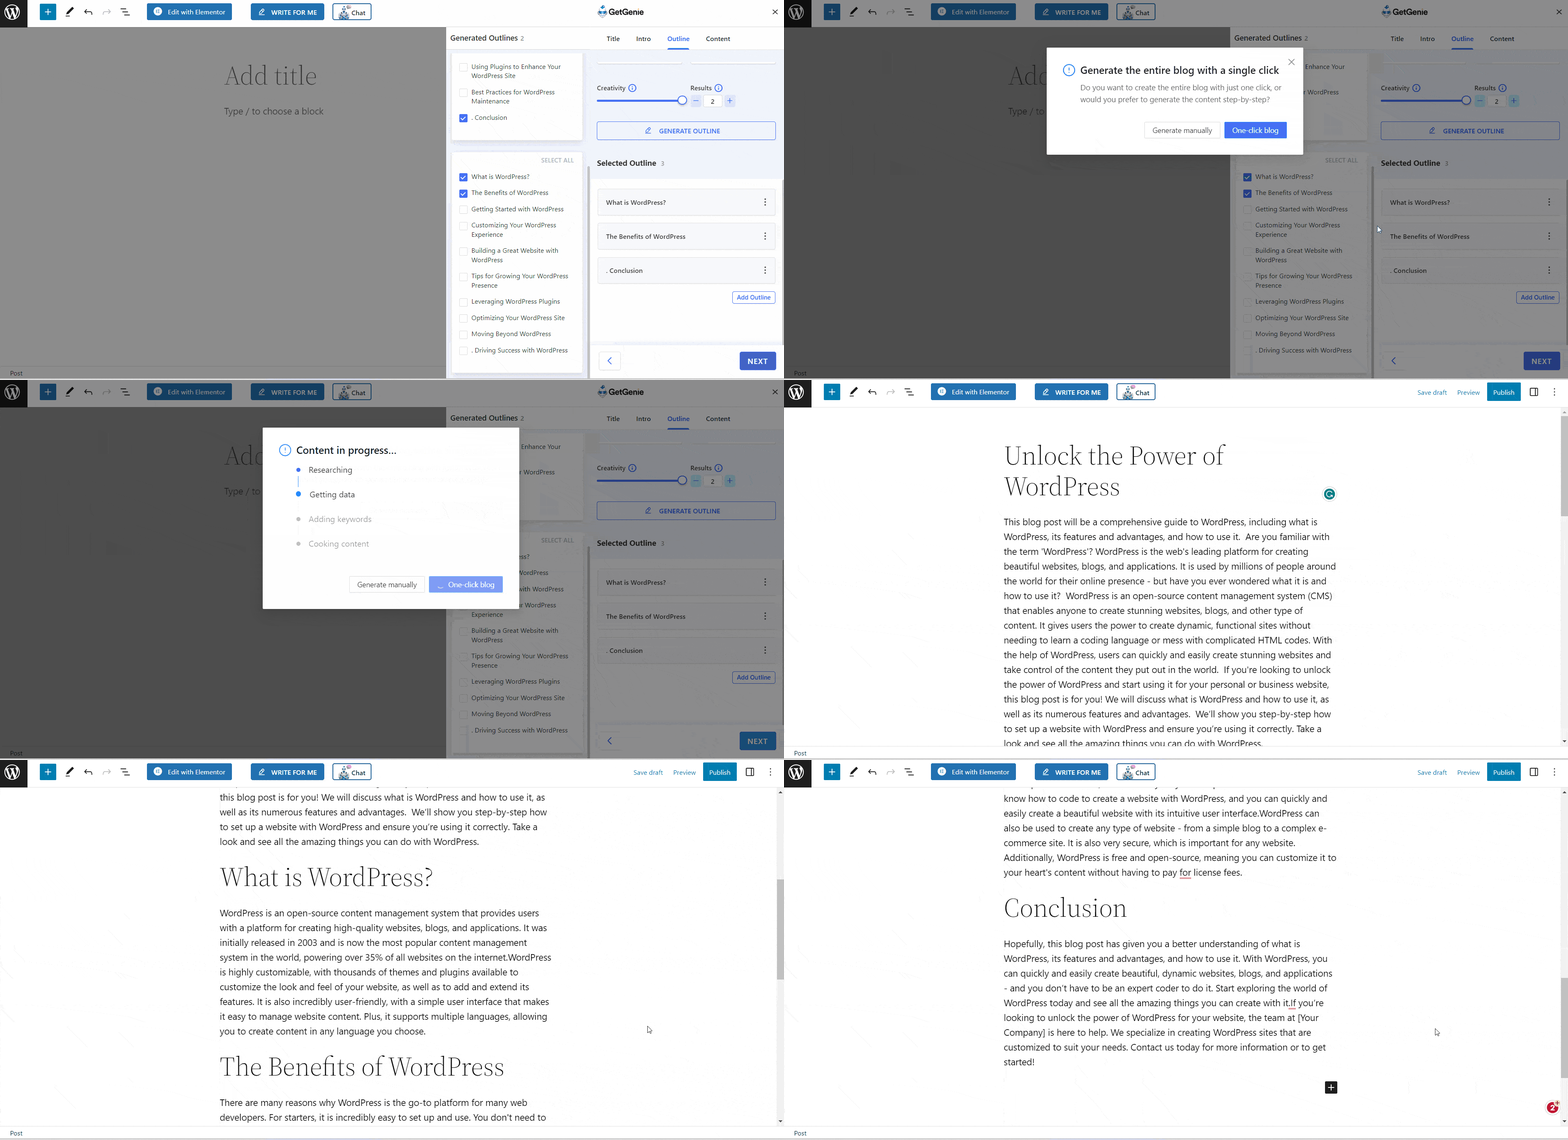
After clicking on Next, a small tab will pop up. You can see the “One-click blog” button here.
- Click on “One-click Blog”
- It will take a few seconds to generate the whole blog post with the all content of each heading
- The entire blog post will appear in the site editor automatically
Alternative Method – Generate Content Manually #
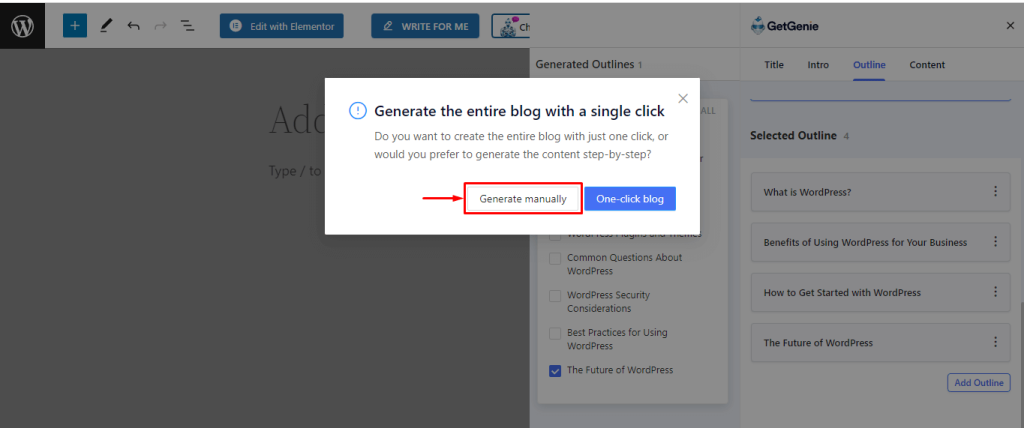
If you prefer to write content for each heading separately, you can use the previous method of Blog Wizard. Following the same process till outline generation, click on “Generate Manually”.
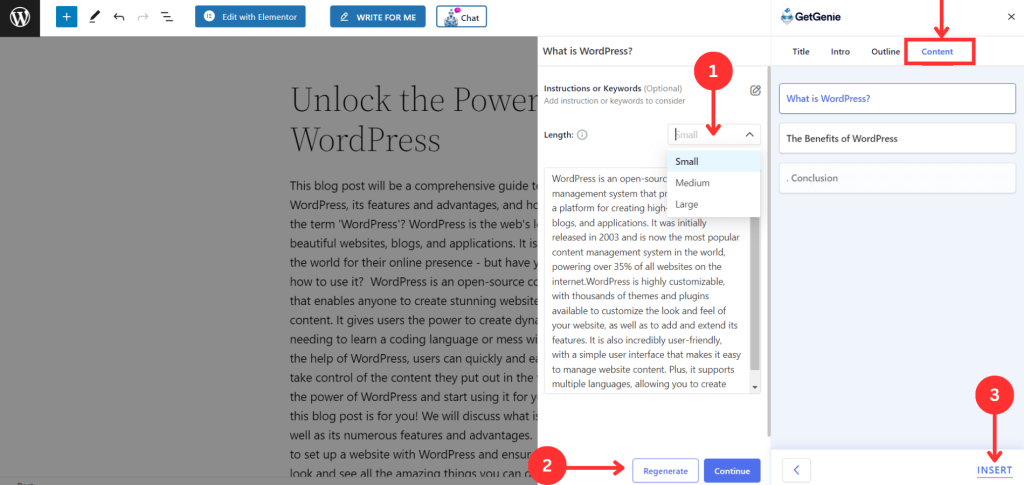
You can also see the individual headings and their content on the “Content” tab. You can regenerate the content if you don’t like the generated output. You can also select the output size e.g. small, medium, and large.
- Select the output size
- Choose the heading then click on “Regenerate”
- Next, click on “Insert”
One-click Blog Generation with GetGenie Ai Playground #
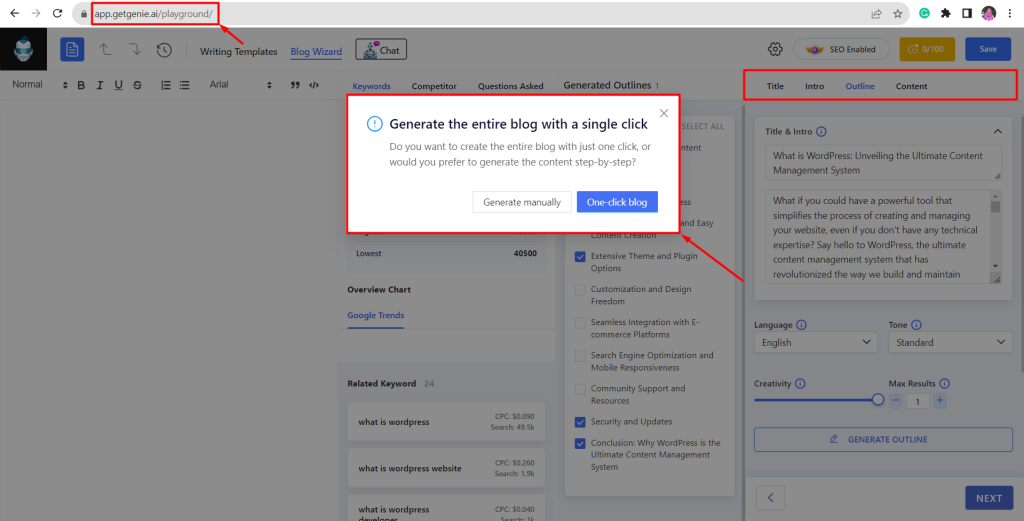
If you are not a WordPress user, you can access the one-click blog feature and write complete blog posts using the SaaS version of GetGenie Ai.
- Go to https://app.getgenie.ai/manage-sites/
- Click on “Playground”
- Create a new file
- You can see all the templates including the Blog Wizard
- Generate title, intro, and outlines
- Write an entire blog post with the one-click blog feature like WordPress
Overall, this one-click blog feature of the GetGenie Ai assistant offers an unparalleled blend of creativity, efficiency, and scalability.


