The Blog Wizard in GetGenie AI comes with an amazing feature for content writers and marketers to generate “Customized Content”.
With this feature, you can write each part of your blog post with your unique voice, style, and preference instead of generating generic content.
👉👉 GetGenie – Download GetGenie
✔️✔️ See the documentation to install and activate the GetGenie Ai plugin
How to Write Customized Content in GetGenie AI (3 Simple Steps) #
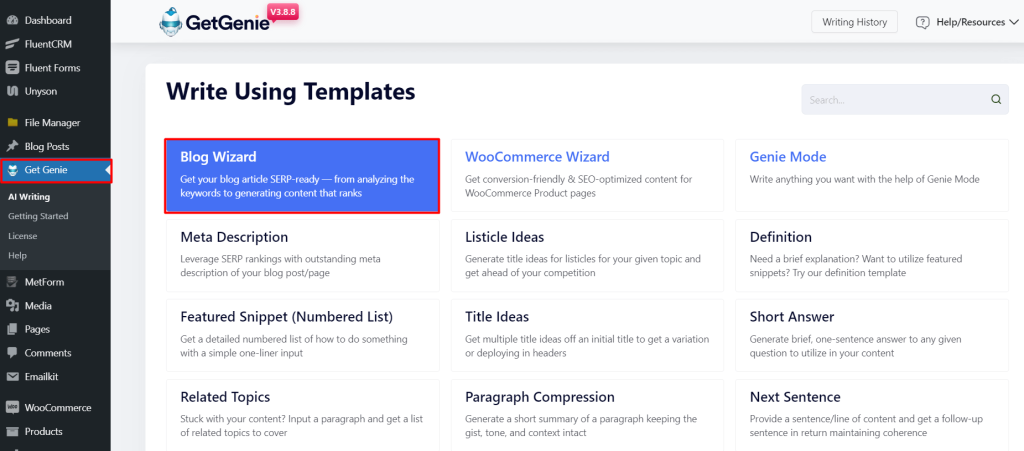
Step 1: Select Blog Wizard Template #
GetGenie AI comes with 37+ content writing templates for blog writing, copywriting, WooCommere, and social media. Among them, Blog Wizard is a one-in-all solution for writing blog posts.
- Go to your WordPress dashboard
- Click on “GetGenie AI”
- Select the “Blog Wizard” template
- It’ll create a new post
Step 2: Generate Blog Title, Intro and Outline #
Next, you can generate a personalized blog title, introduction, and outline. To do so,
➡️ Generate Title #
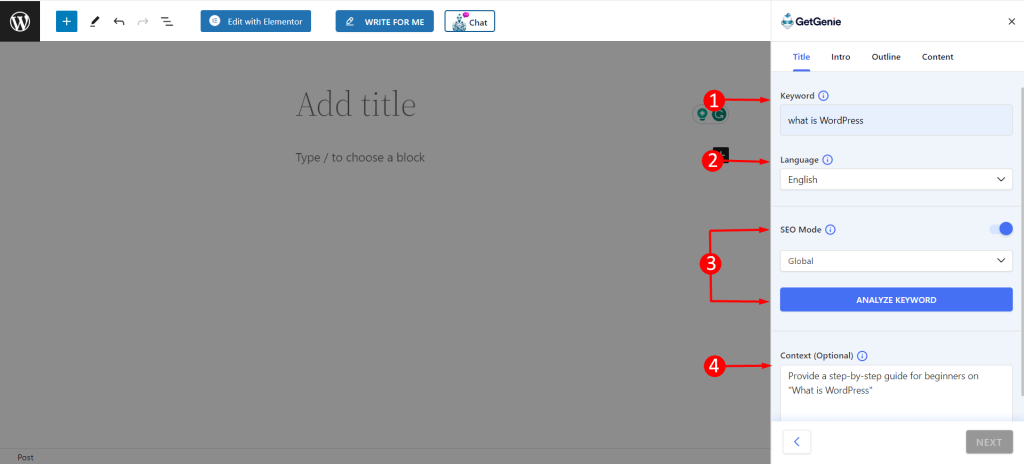
- Write the focus keyword
- Select your preferred language (33 available)
- Turn on the SEO mode
- Select the region of your target audiences
- Click on “Analyze Keyword”
- To learn more about keyword analysis, follow this documentation
- Write the keyword context though it’s optional
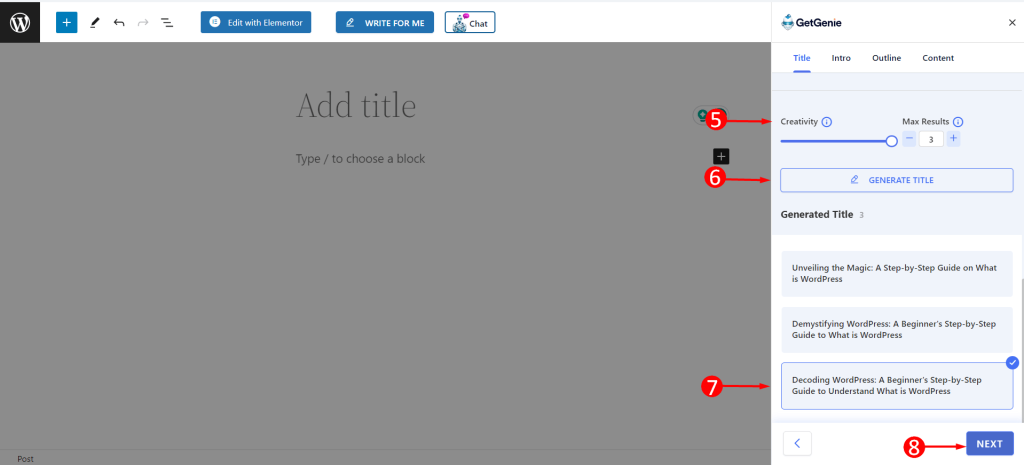
- Select the creativity (up to 5) to make your content unique
- Choose the number of results (up to 6) you want
- Click on “Generate Title”
- After getting the preferred number of titles, choose one of them.
- Then click on “Next” to write the blog introduction.
➡️ Generate Blog Intro #
To generate the blog introduction,
- Choose the language
- Set the creatively and results or keep them as the previous values
- Click on “Generate Intro”
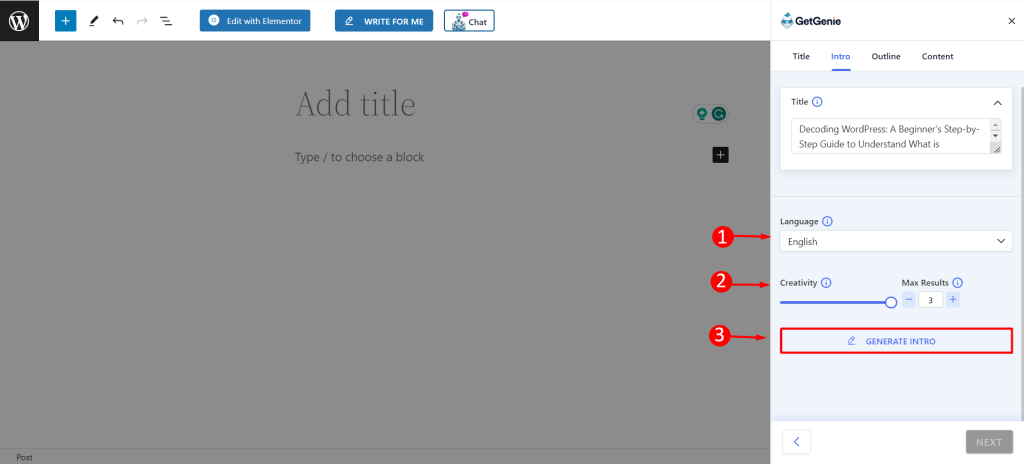
It will generate the given number of introductions, choose the best one, and click on “Next”.
➡️ Generate Blog Outline #
To generate a blog outline for customized content writing,
- Set the language, creativity, and number of maximum outputs you want to generate
- Click on “Generate Outline”
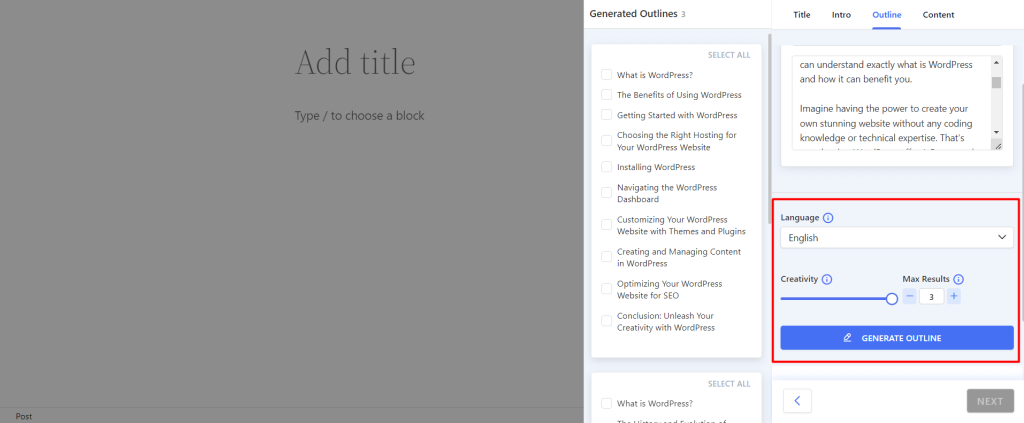
- After generating outlines, mark the preferred heading you want to include in your content
- Or, click on “Select ALL” to add all the headings
- Click on “Add Outline” to add custom headings
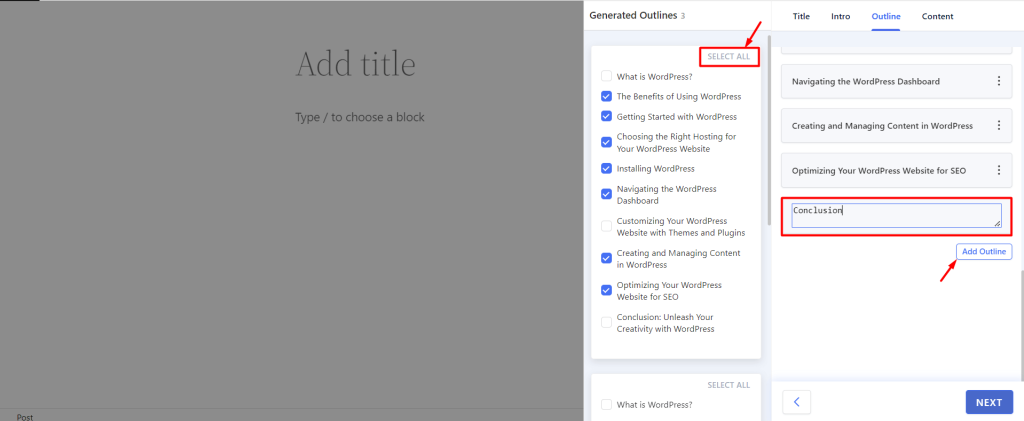
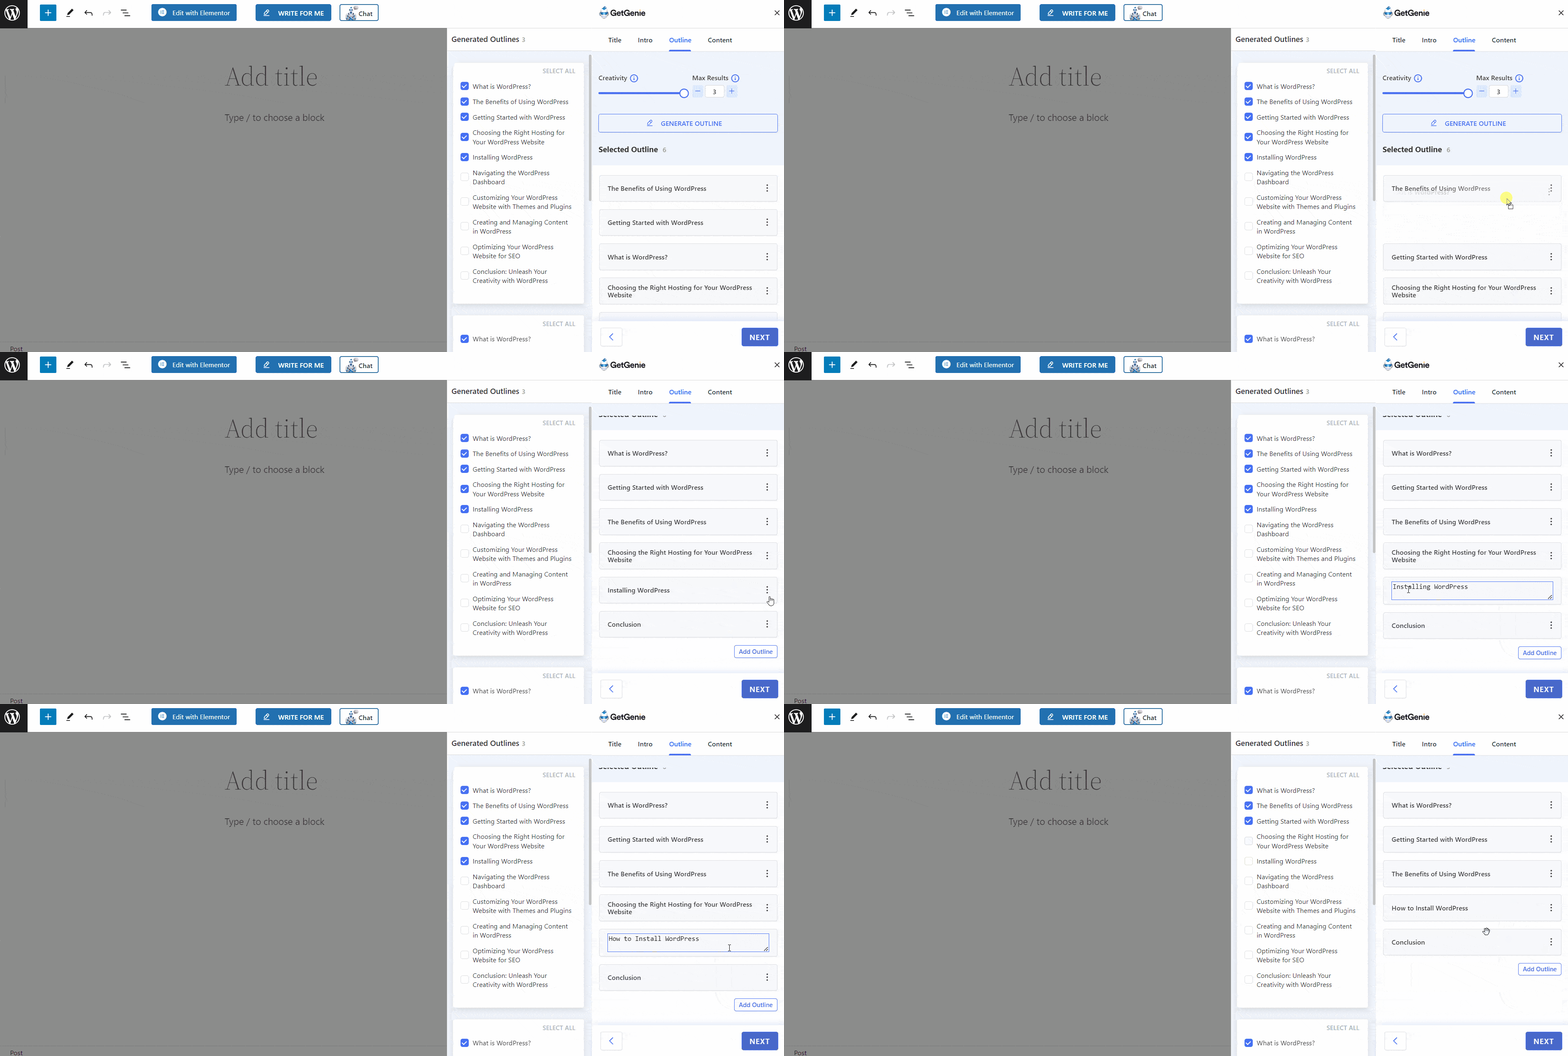
- You can swap/edit/delete the headings if necessary
- Finally, click on “Next”
Step 3: Generate Customized Content #
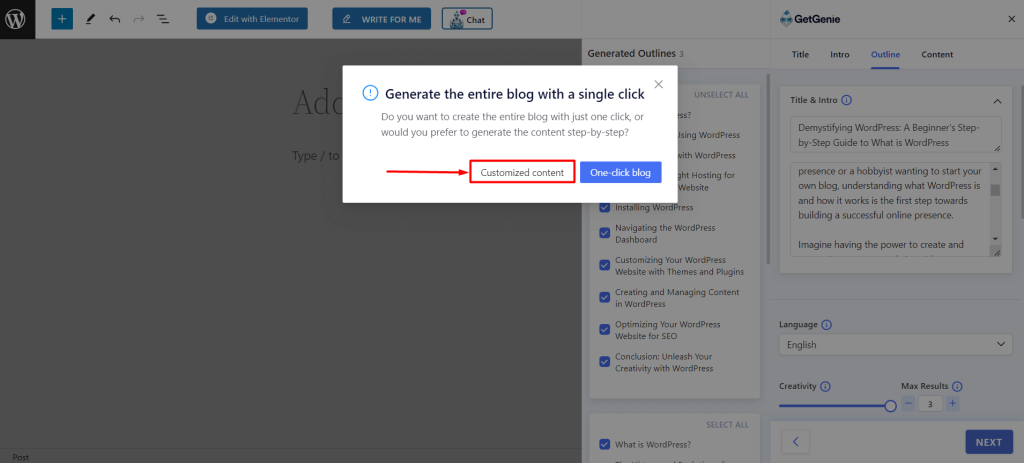
This time, you can see a small pop-up window for “Customized Content” and “One-click blog” generation. The one-click blog feature is used to generate content for all headings at a time in just 1-click.
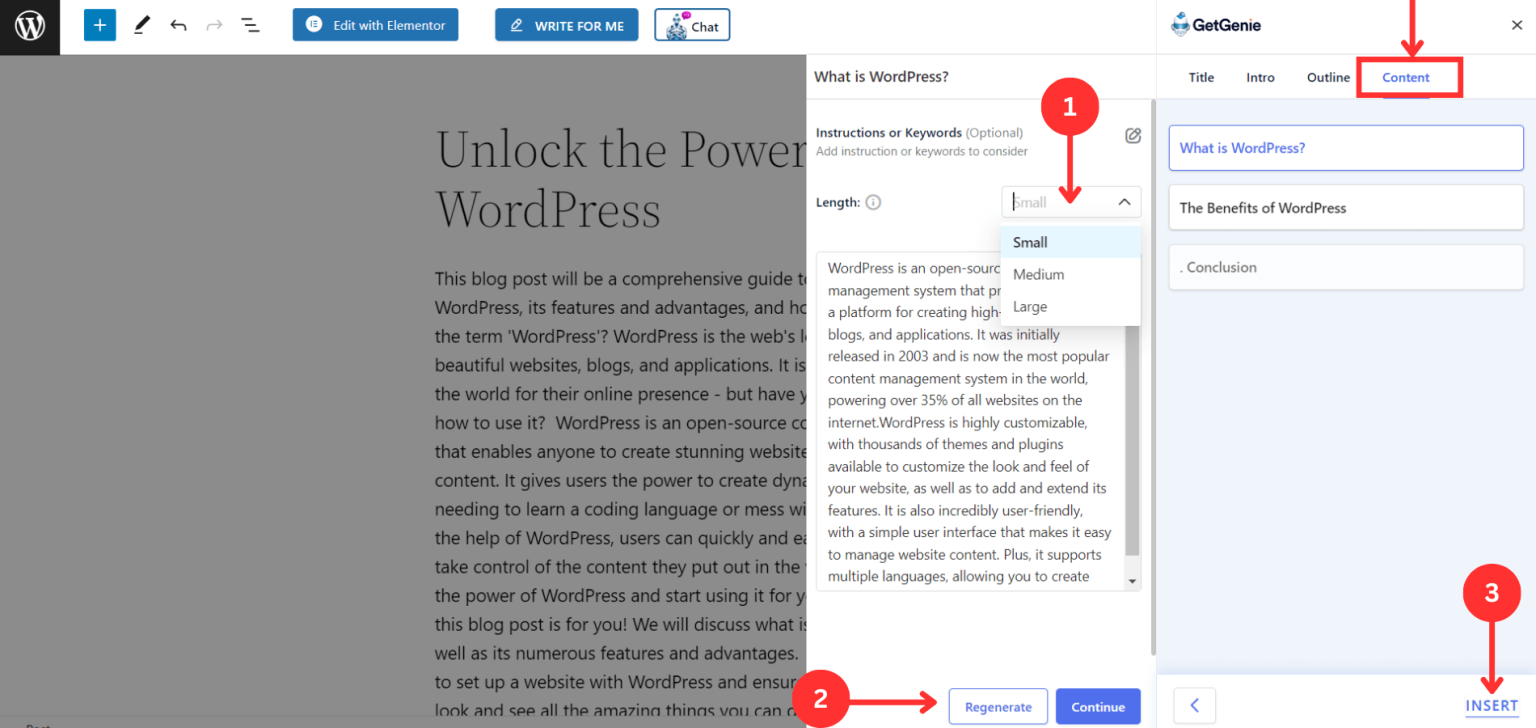
You can write content for each heading in the blog wizard using the “Customized Content” option. For this,
- Select “Customized Content”
- Mark the headings one by one
- Select the output size e.g. small, medium, and large
- Click on “Generate”
- Next, click on “Continue” or “Regenerate” if need different output
- Repeat for all headings and then click on “Insert”
- The entire blog post will be inserted into the WordPress block editor
✨ Add Custom Keywords #
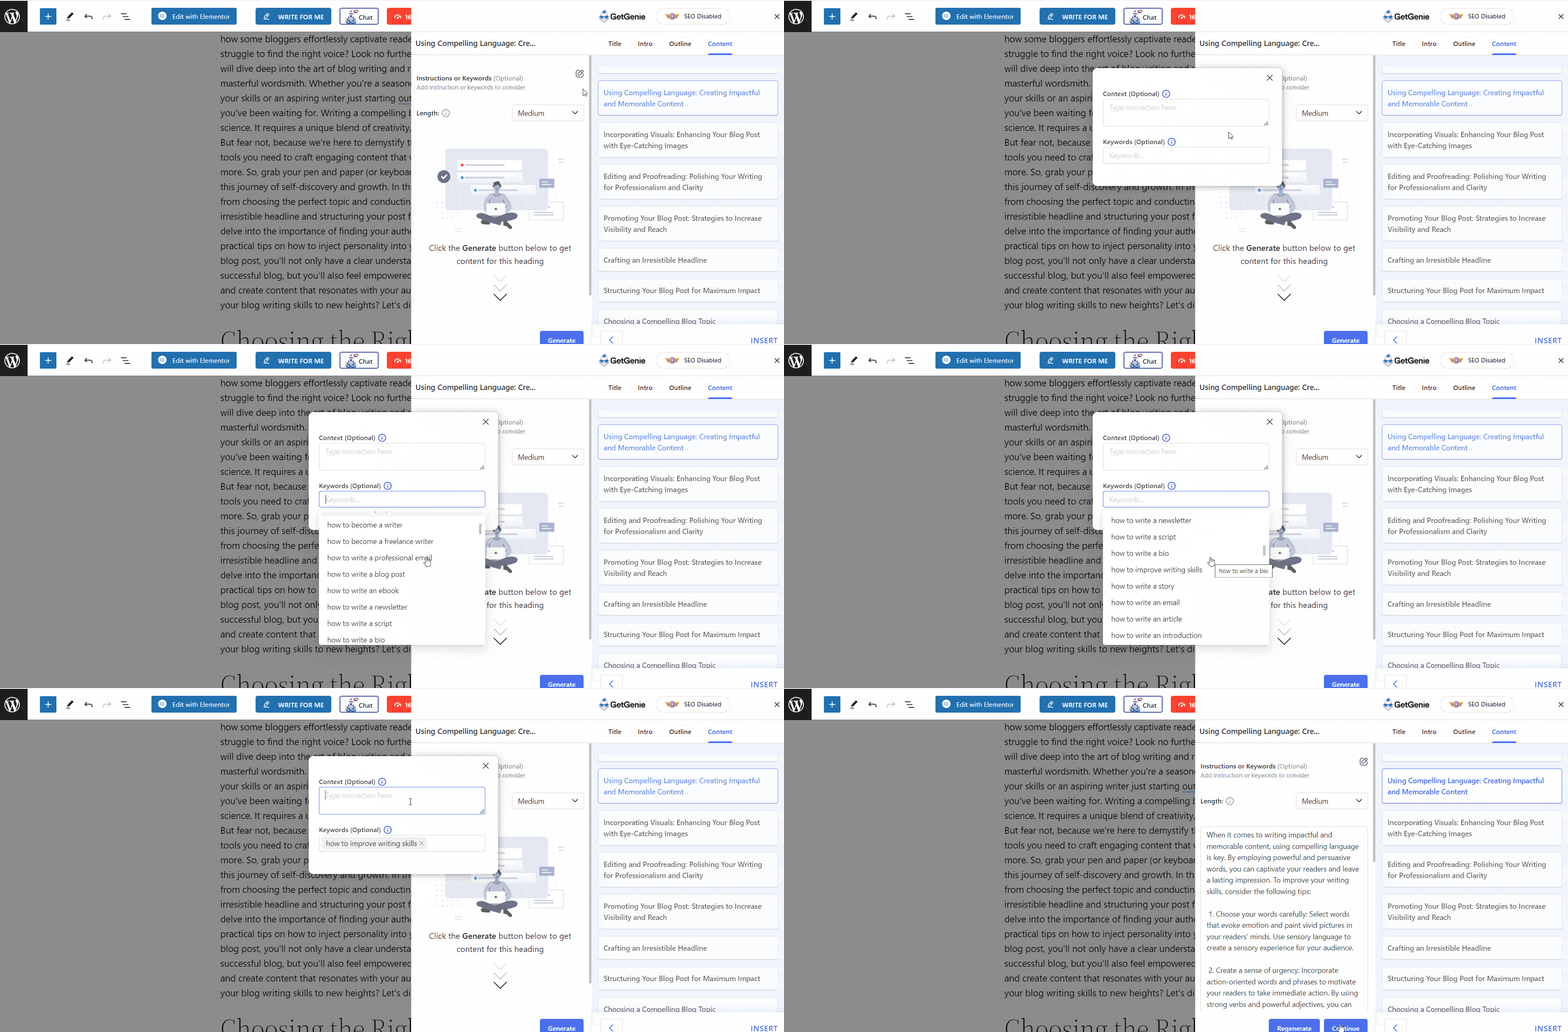
If you want to add custom keywords to your content, you can do it too in the blog wizard’s customized content feature.
- Click on the “Instructions or Keywords” to add a custom keyword
- Write or select keywords from the suggested
- Write the context; it’s optional
- Click on “Generate”
- The content for the given keyword will be added to your content
✨ Rewrite Content #
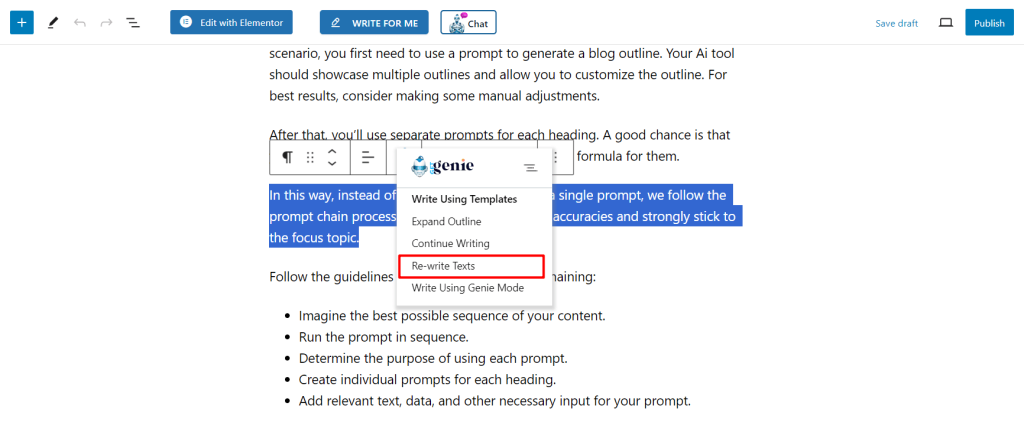
You can rewrite blog content inside the WordPress block editor using the “Content Rewrite” feature of GetGenie AI. For this,
- Select the text/paragraph you want to rewrite
- Click on “GetGenie AI” icon
- Select the “Re-write Texts” option from the dropdown
✨ Insert AI Image #
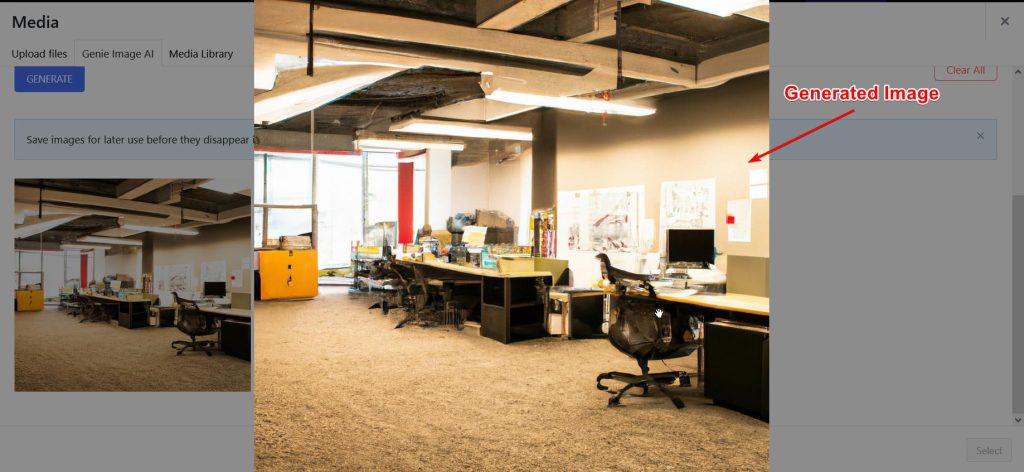
- You can add 100% unique images with Genie AI Image in your blog post
Finally, once you are happy with your blog, save the draft or publish the blog post.
You can also generate customized content in your favorite browser using the SaaS version of GetGenie AI.
👉 See this step-by-step guide to using GetGenie AI playground.
So why are you waiting? Utilize this amazing feature and write personalized content with the help of GetGenie AI’s Blog Wizard.


