One-click Blog Generation in GetGenie: A New Feature Unveiled

What if you could write a complete blog post in just one click? Sounds too good to be true, right?
And, guess what! We are excited to introduce you to the “One-Click Blog” — a brand-new feature of GetGenie AI writing assistant. This feature is integrated with GetGenie’s most useful Blog Wizard template.
Using this 1-click blog feature, you can now write an entire blog post instead of generating content for each heading one by one. And, the best part is that you can write content for WordPress websites as well as use this feature through GetGenie’s playground if you are not a WordPress user.
Let’s explore how GetGenie’s One-click blog work for seamless content generation.
- One-Click Blog Generation in GetGenie AI: At a Glance
- How to Write a Complete Blog Post with the One-click Blog Feature (2 Methods)
- Measure Content Score and Check Plagiarism
- Generate Content Manually – Alternate Method
- Final Words
One-Click Blog Generation in GetGenie AI: At a Glance
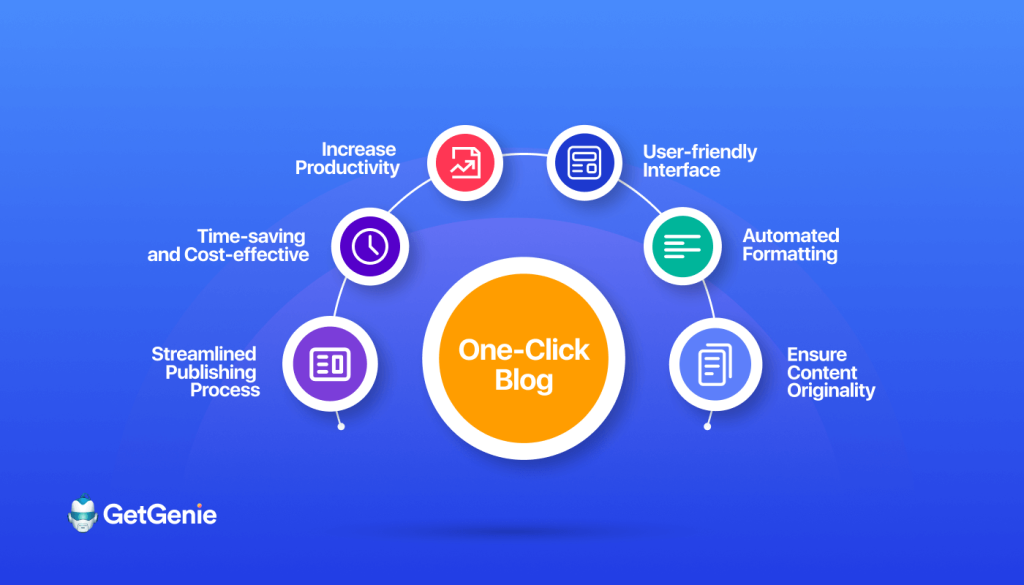
➔ Select blog wizard
Boom! The entire blog post will be ready within seconds.
➔ Choose a language, adjust creativity level, and the number of results
➔ Generate blog intro, title, and outline
➔ Select the “One-click blog” option
How to Write a Complete Blog Post with the One-click Blog Feature (2 Methods)
The one-click blog post creation feature is designed and developed for hassle-free blog post generation. That’s why, it’s integrated into the Blog Wizard feature. As a result, you can write a complete blog post containing a title, an intro, and some headings.
Also, you can navigate the other features of Blog Wizard including competitor analysis, content score , and plagiarism checker.
Let’s see 2 methods of using the one-click blog feature of GetGenie for content writing in WordPress and Webview Playground.
Method 1: Use One-click Blog Generation on WordPress Website
To enjoy the one-click blog feature on your WordPress website, simply follow the following steps –
Step 1 – Install GetGenie and Activate the License
First, install the GetGenie plugin to your WordPress website and activate the license. However, GetGenie offers 2500 words free for our valuable users.
The installation and activation process is super easy. To learn more, check out this documentation for a step-by-step guide to install and activate GetGenie’s license to your WordPress website.
Step 2 – Select Blog Wizard Template and Generate Blog Title
Once GetGenie is installed and activated, you can start writing content using the one-click blog generation feature.
Go to your WordPress dashboard. Navigate GetGenie directly by clicking on “GetGenie AI Writing”.
Or, create a new post by hovering over “Posts – Add New”. Then click on “Write for me”. And, all 37+ templates will appear on the right sidebar.
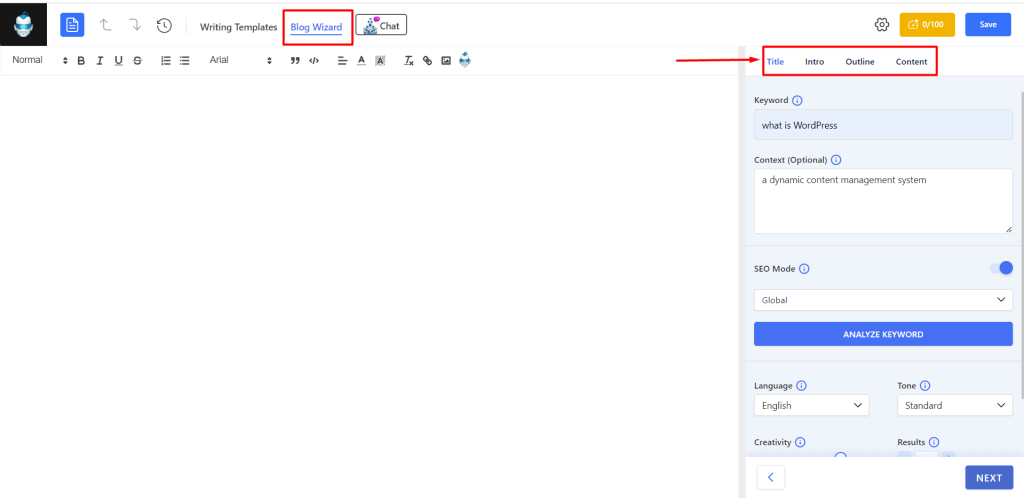
- Select the “Blog Wizard” template
- Write the keyword and context (optional) of the keyword
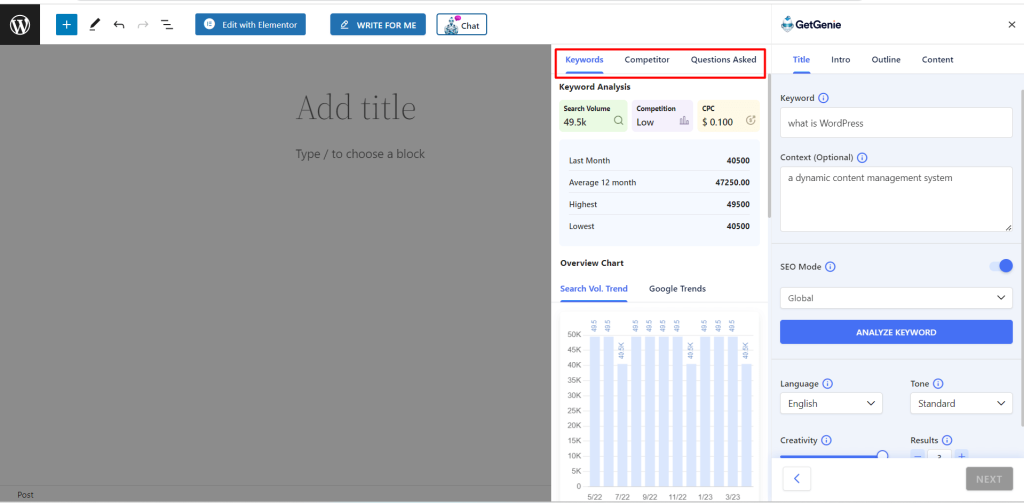
- You can turn on the SEO mode and select the region for keyword analysis
You can analyze the search volume, Google Trends, and related keywords from here. Also, you can fetch the competitor’s data and get the related asked questions for the given keyword.
- Next, select the language (GetGenie AI supports 33+ languages)
- Adjust the creativity level (up to 5) and the number of outputs (up to 6) you want to generate
- Click on “Generate Title”
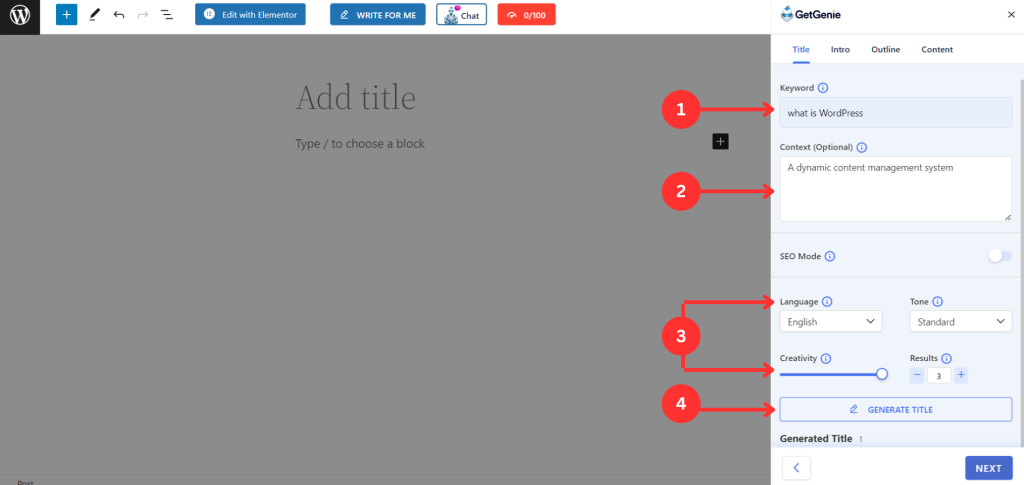
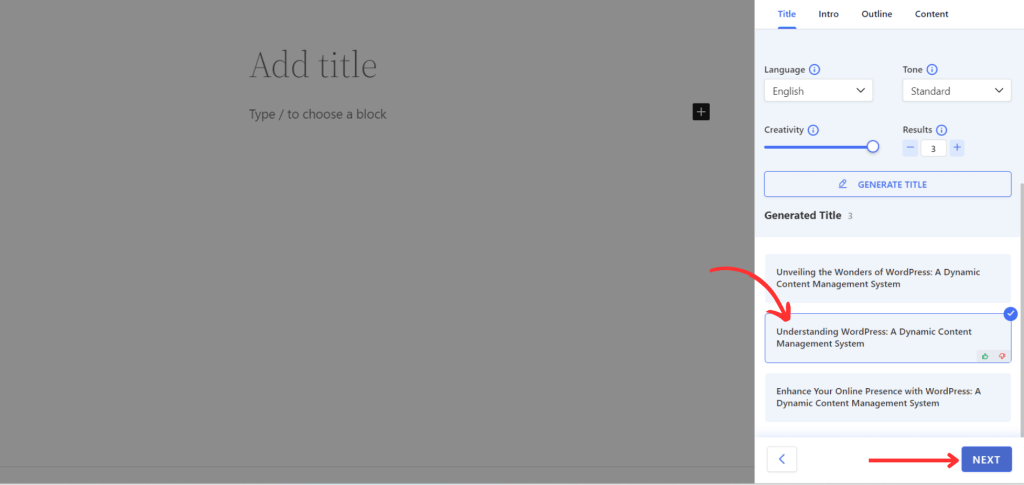
- It will generate the given number of titles
- Select the preferred one and click on “Next”
Step 3 – Generate Blog Intro and Outline
After that, you need to generate the intro for the blog.
- Set the language, creativity, and results values, or keep the previous values.
- Click on “Generate Intro”
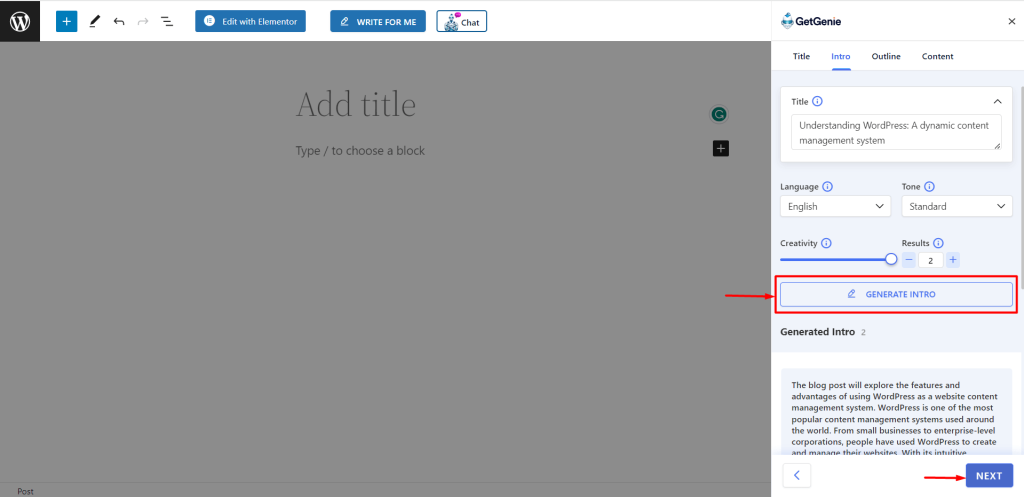
To generate an outline, select the best one among the generated results for the blog intro.
- Click on “Next”
- You can see the selected title and intro here. Customize the properties if you want or keep them as it is.
- Click on “Generate Outline”
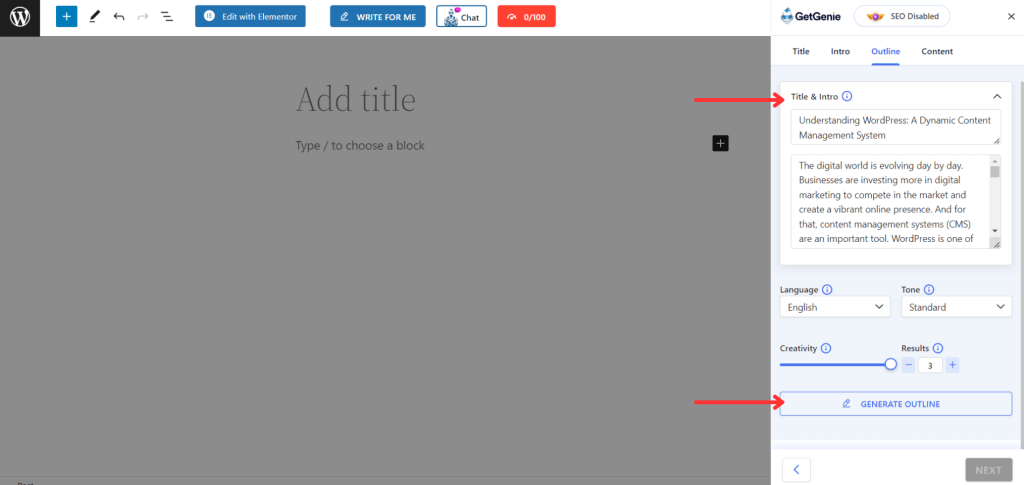
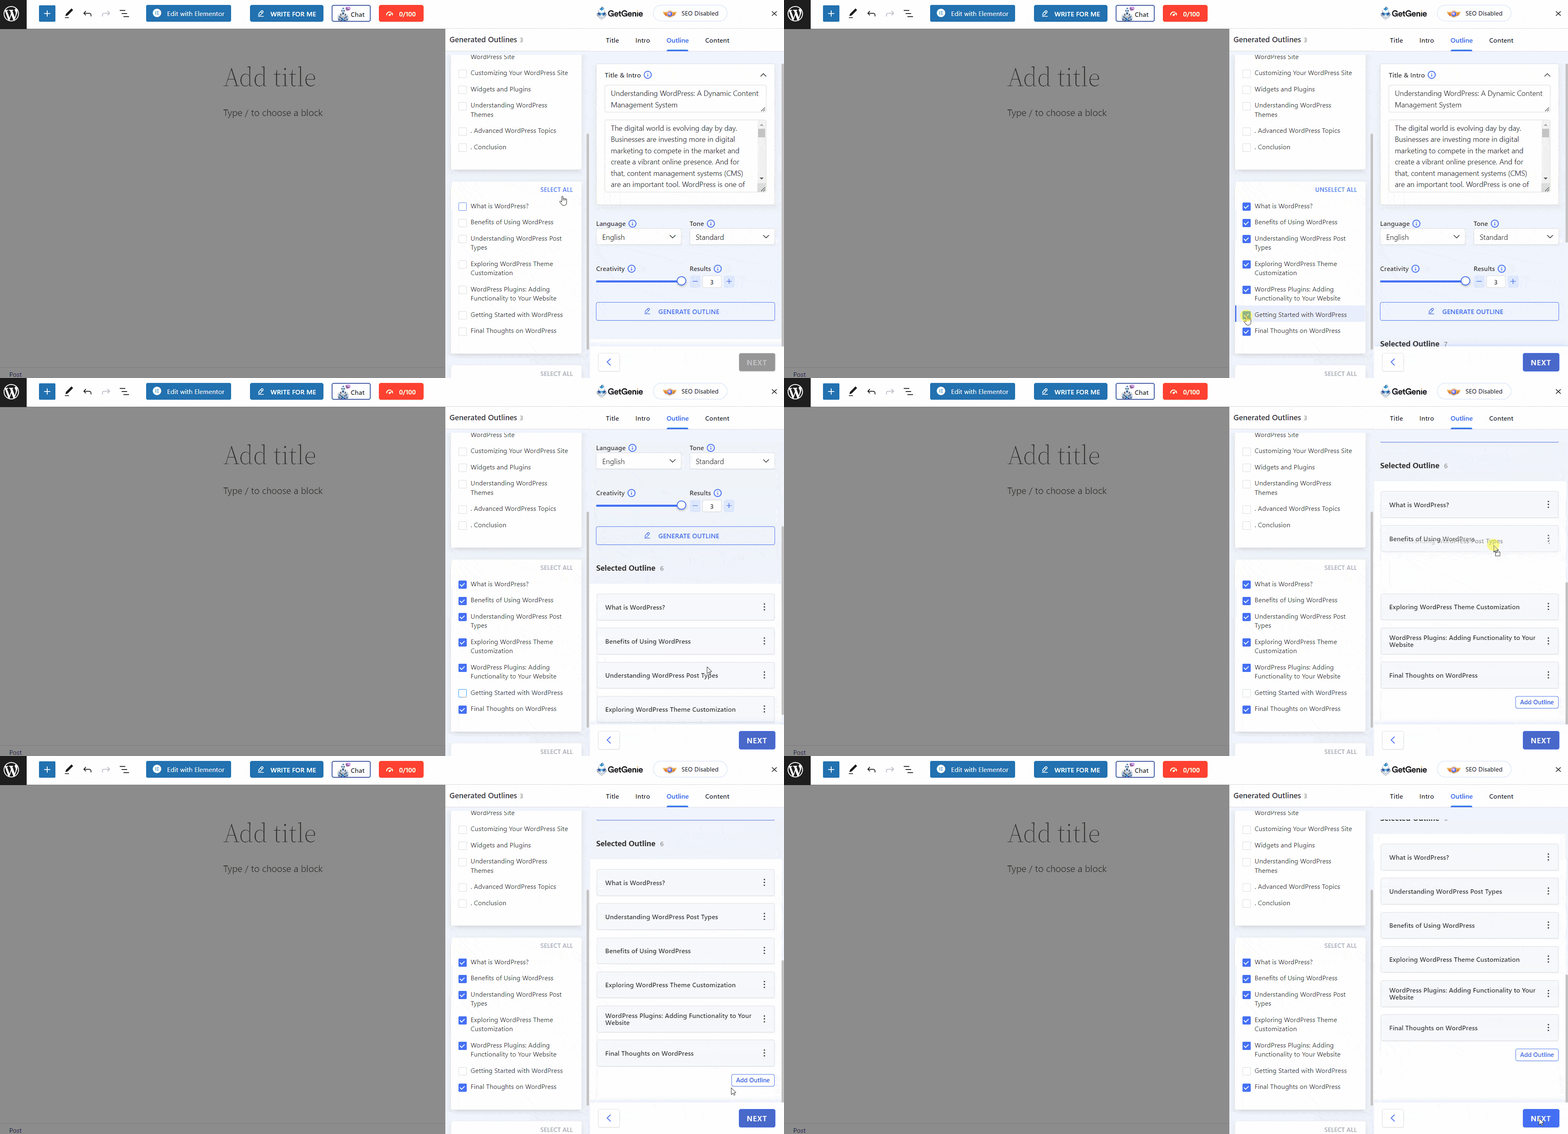
You can see all the generated results for the outlines at the sidebar. You can select them all by the “Select all” option or add them one by one. You can change the outline order by simply swapping them.
- You can also add a custom heading for the blog on the “Add Outline” Field.
- Then click on “Next”
Step 4 – Select the One-click Blog Generation Option
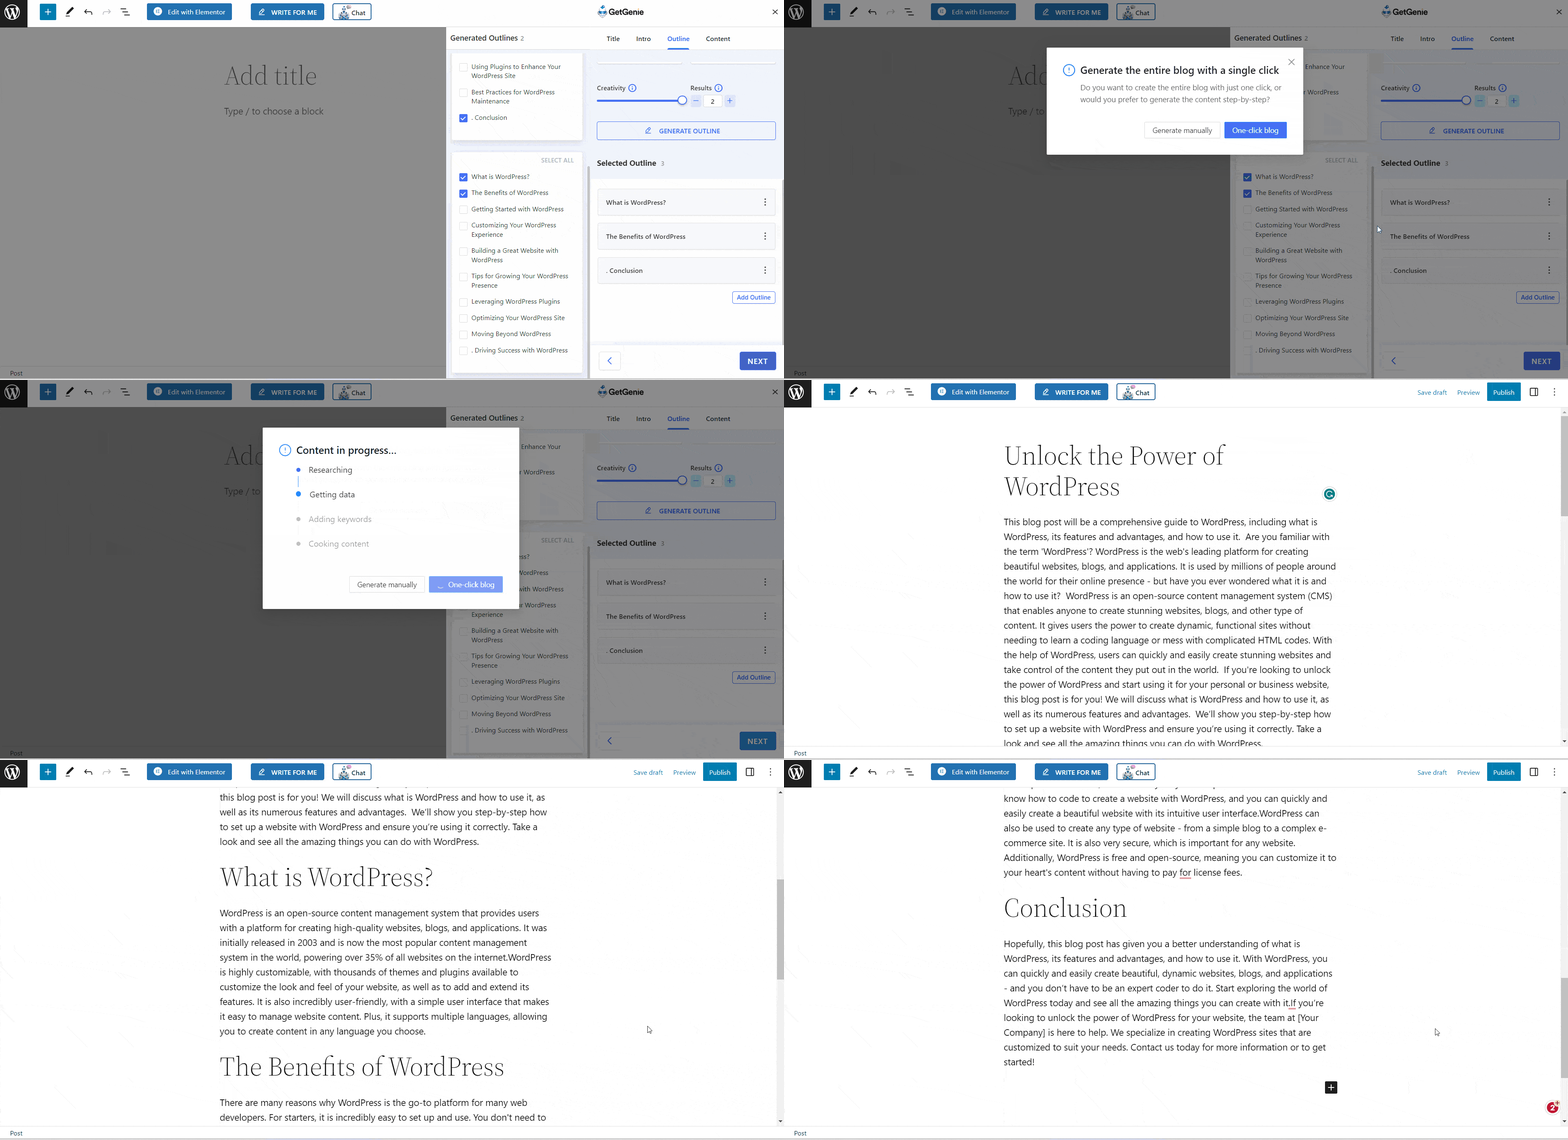
Once you click on “Next” after selecting the outline, a small window will pop up. You can see the “One-click Blog” option.
- Click on “One-click Blog”
- It will produce the entire blog post within a few seconds through the steps:
- The blog post will be inserted in the site editor automatically.
Method 2: Webview Method for non-WordPress Content Generation
GetGenie ensures its usability among all kinds of users to provide flawless and hassle-free content generation. So, If you are not a WordPress user, don’t worry.
GetGenie has launched its SaaS version or web editor too. Generating content using the blog wizard and one-click blog generation feature is almost the same, you just don’t need to install the GetGenie AI plugin.
- Navigate to app.getgenie.ai/playground (after logging in)
- Create a new file (or open an existing one)
- You can see all templates of GetGenie here
- Select Blog Wizard, write a keyword, set properties, and then generate the title, intro, and outline like the previous method.
- Then click on the “One-click Blog” option to write a complete blog post within a few seconds.
Measure Content Score and Check Plagiarism
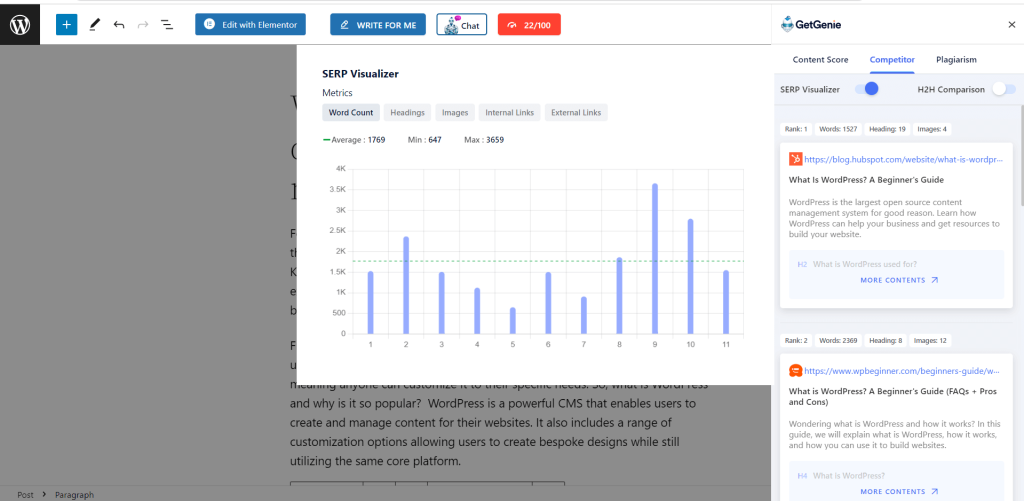
Whether you generate a blog in WordPress or through Playground, you can see the content score at the top bar.
Click on the score. You can see the content details including word count, headings, NLP, and internal links. Also, you can see SERP visual and head-to-head competitor analysis to improve your content score.
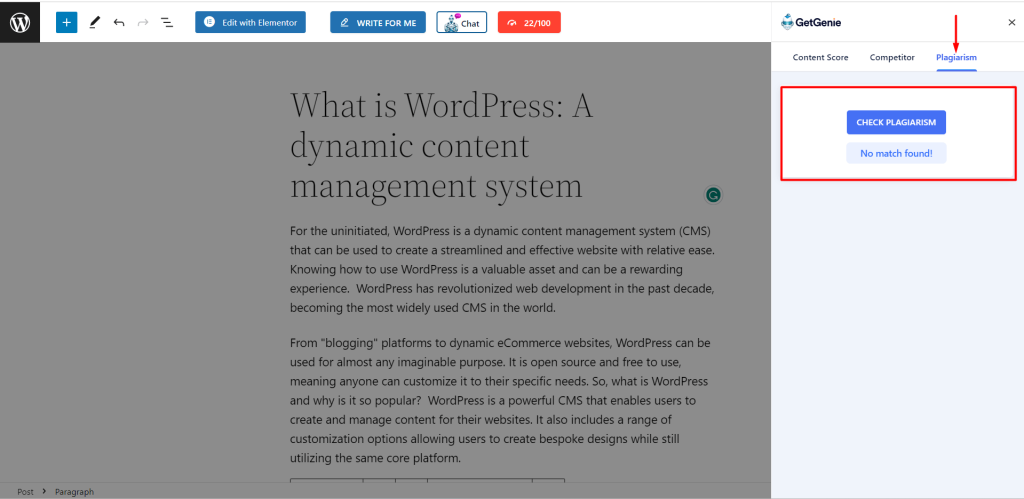
Apart from these, now you can check content originality for the Copyscape integration with GetGenie.
- Navigate the Plagiarism tab
- Click on “Check Plagiarism”
- It will show the plagiarism report if the generated content is copied from anywhere else or not.
Generate Content Manually – Alternate Method
Don’t wanna generate blog posts in one click?
If you want to generate content manually for each heading or regenerate them like before, GetGenie’s blog wizard still has these features.
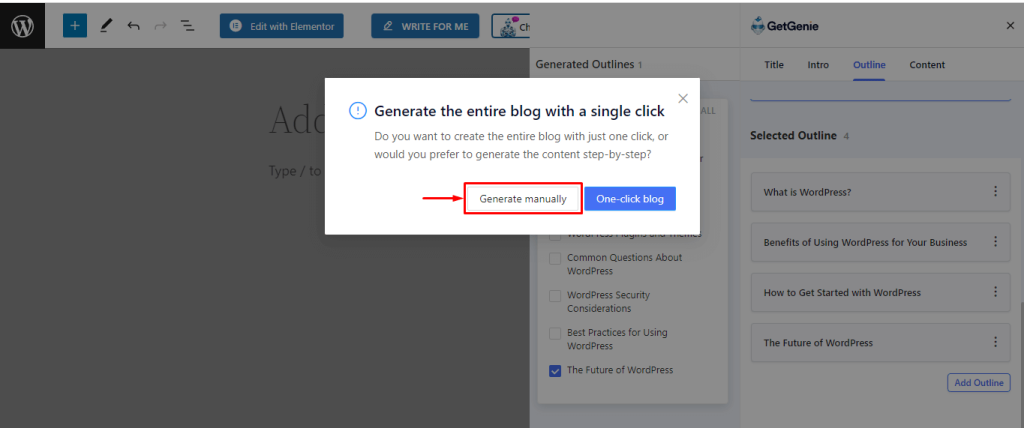
When you select “Outline” and click on “Next”, you can see the “Generate Manually” option along with the one-click blog generation.
- Click on “Generate Manually”
- Content will generate one by one manually
If you don’t like the output, you can regenerate them.
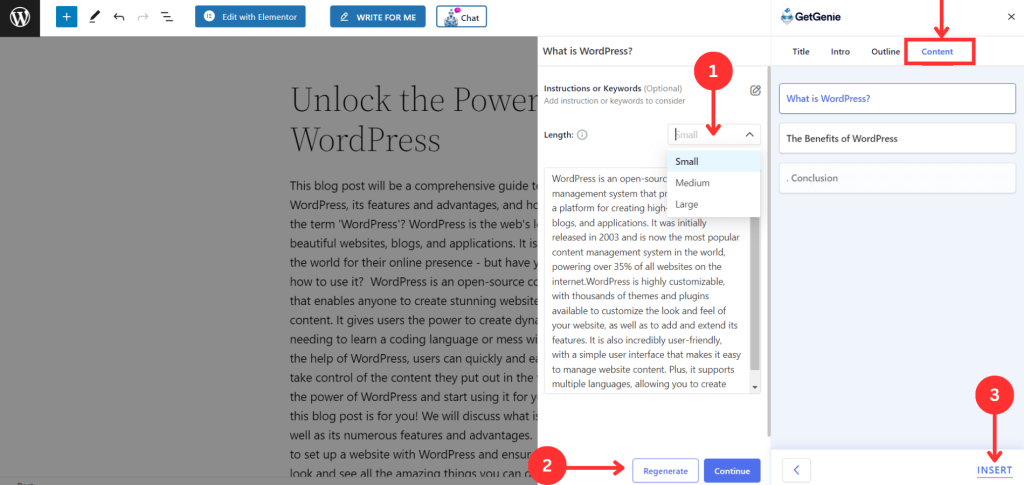
- Go to the content tab
- Select the heading
- Select output size (e.g small, medium, large)
- The best part is that you can specify separate keywords for optimized content under every heading
- Click on “Regenerate”
- Click on “Insert”
Final Words
Our goal is to simplify and streamline the blog generation and publishing process in one click. Besides, this feature is versatile for generating content for WordPress and non-WordPress content management.
Overall, this one-click blog generation feature of GetGenie will save you time and enhance productivity. Plus, you can engage with audiences through quick and efficient content creation.
So, why are you waiting? Try this new one-click blog feature today and take blog writing to the next level.

