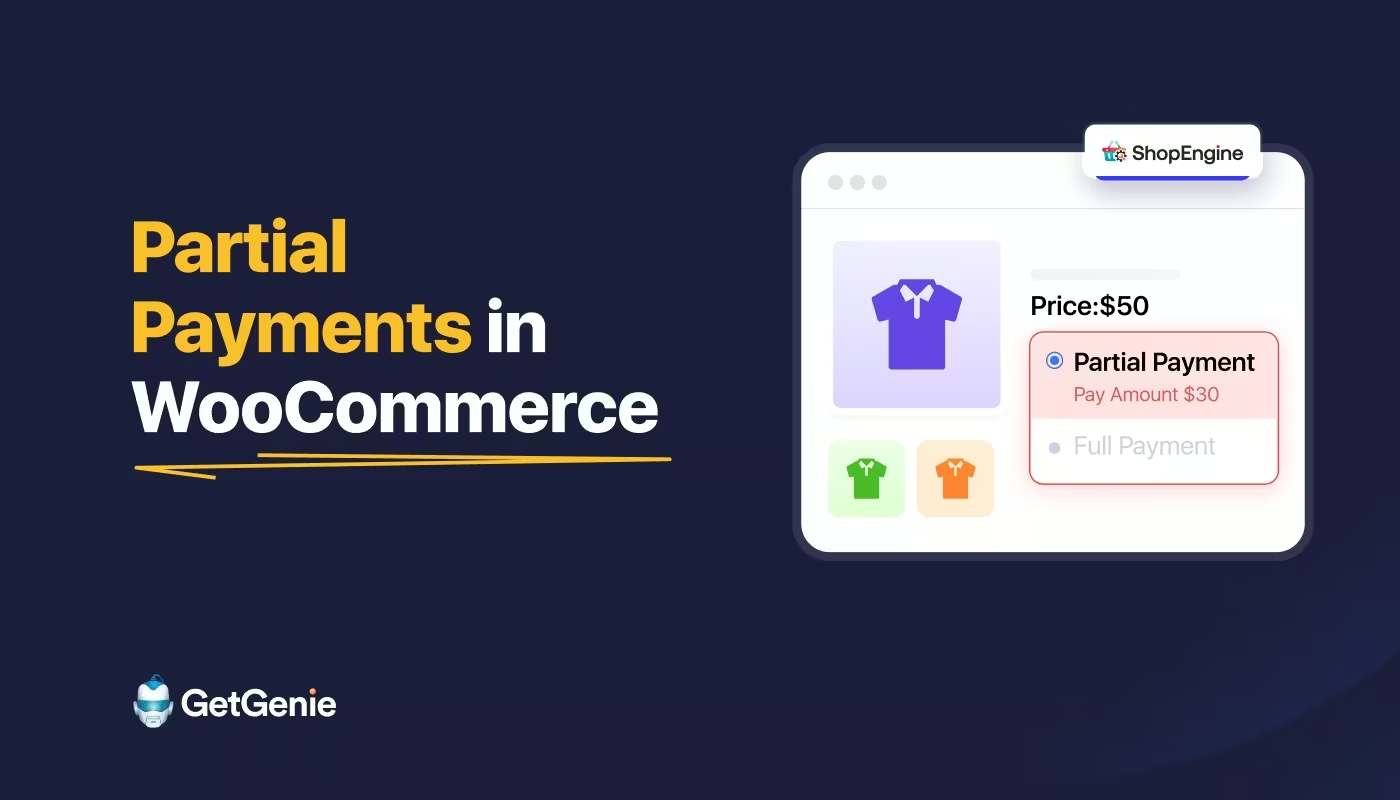
Increase Conversions with Partial Payments in WooCommerce
Hurtigt overblik
To add partial payment in WooCommerce, you have to use a WooCommerce partial payment plugin like ShopEngine. This allows customers to pay a fraction of the total cost upfront and the balance later.
The setup involves configuring global payment rules, enabling partial payments on a per-product basis, and designing a custom “Due Payment” template using the Elementor builder.
Here are the key considerations for a successful partial payment setup:
✅ Activate the Module: Enable the Partial Payment add-on within ShopEngine settings to keep your site’s performance optimized.
✅ Set Global Defaults: Define standard deposit types (Fixed or Percentage) and automated email reminder schedules for balance payments.
✅ Product-Level Control: Enable installments for specific high-ticket items and override global rates for unique products.
✅ Build a “Pay Due” Page: Create a dedicated Checkout Order Pay template using the ShopEngine builder so customers can easily clear their remaining balance.
✅ Custom Labels: Clearly label “Amount to Pay Now” and “Due Amount” at checkout to ensure transparency and trust.
✅ Automated Reminders: Configure the system to automatically nudge customers via email after a set number of days to settle their outstanding invoices.
✅ End-to-End Testing: Use an incognito window to verify that the “Pay Due” button appears in the customer’s account dashboard after the initial deposit.
Set Up Partial Payment in WooCommerce
Follow these five simple steps to incorporate an installment system into your store without touching a single line of code.
Step 1: Download and Activate ShopEngine
First, you need to install and activate ShopEngine free and pro versions, along with WooCommerce and Elementor.
- In your WordPress dashboard, go to Plugins > Add New Plugin.
- Søge efter ShopEngine and select based on your editor.
- Klik Installere og Aktiver.
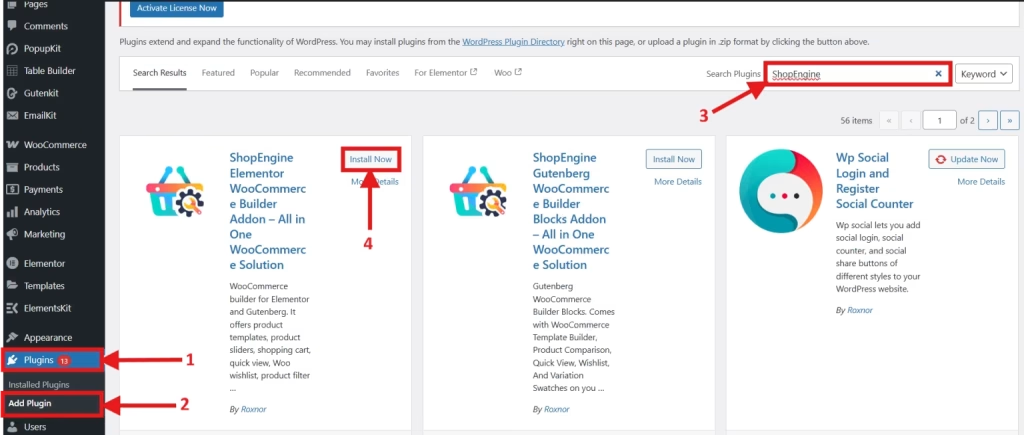
- Navigate to Plugins > Add New Plugin > Upload Plugin.
- Purchase and download ShopEngine Pro.
- Upload the zip file, click Installer nu, and then Aktiver.
- Ensure you also have WooCommerce og Elementor active, as ShopEngine works alongside them.
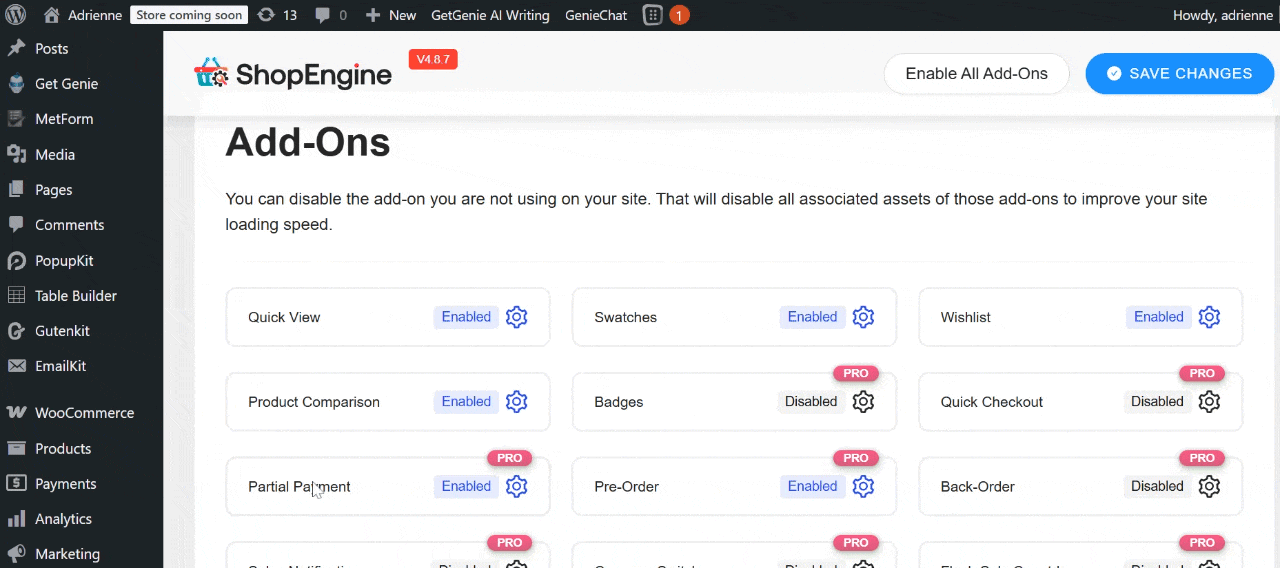
Step 2: Enable the Partial Payment Add-on
Once the plugin is active, you need to turn on the specific add-on.
- Naviger til ShopEngine > Add-on.
- Find Partial Payment module in the list.
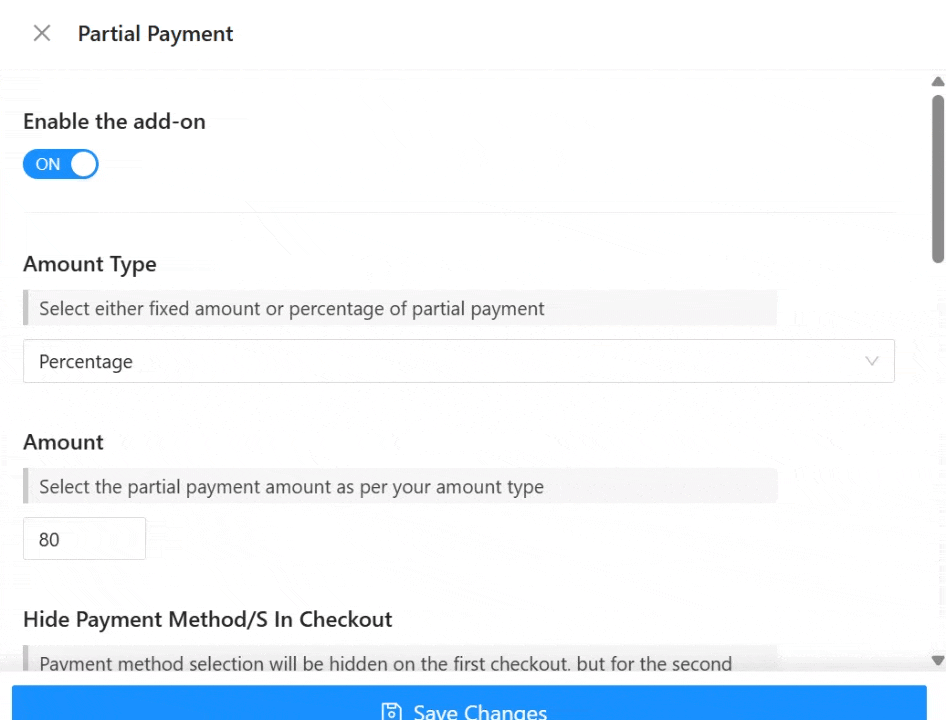
- Click on the gear icon and toggle the switch to Enable.
- Configure global defaults:
- Amount Type: Choose between Fixed Amount eller Percentage.
- Amount: Enter the default value (e.g., 20 for 20%).
- Email Reminders: Set how many days after the order an automated reminder should be sent.
- Hide Payment Method/s in Checkout: Enable this option to hide the payment method selection on the checkout page.
- Send Mail After Order Date in Day/s: Choose how many days after a purchase customers should receive payment reminder emails.
- Partial Payment Loop Product Label: Display a custom product listing label indicating that partial payment is available.
- Partial Payment Single Product Label: Display partial payment information directly on the individual product page.
- Full Payment Label: Ensure that the option to pay the full amount upfront is clearly indicated.
- First Installment Label: Indicate the amount of the first installment payment.
- Other Installment Label: Specify the text for upcoming or recurring installment payments.
- To Pay Label for Checkout Page: Show the current amount due at checkout for partial payments.
- Disable Coupon: Toggle it on if a coupon discount price will not be applicable for the partial payment product.
Step 3: Edit the Product Page to Enable Partial Payment
You might not want partial payments for every item. Here is how to enable it for specific products:
- Gå til Products > All Products and select the item you want to edit.
- Scroll down to the Product Data box.
- Look for the Partial Payment tab on the left sidebar.
- Check the box to Enable Partial Payment.
- You can override global settings here. For example, if this specific product requires a higher 50% deposit instead of your usual 20%.
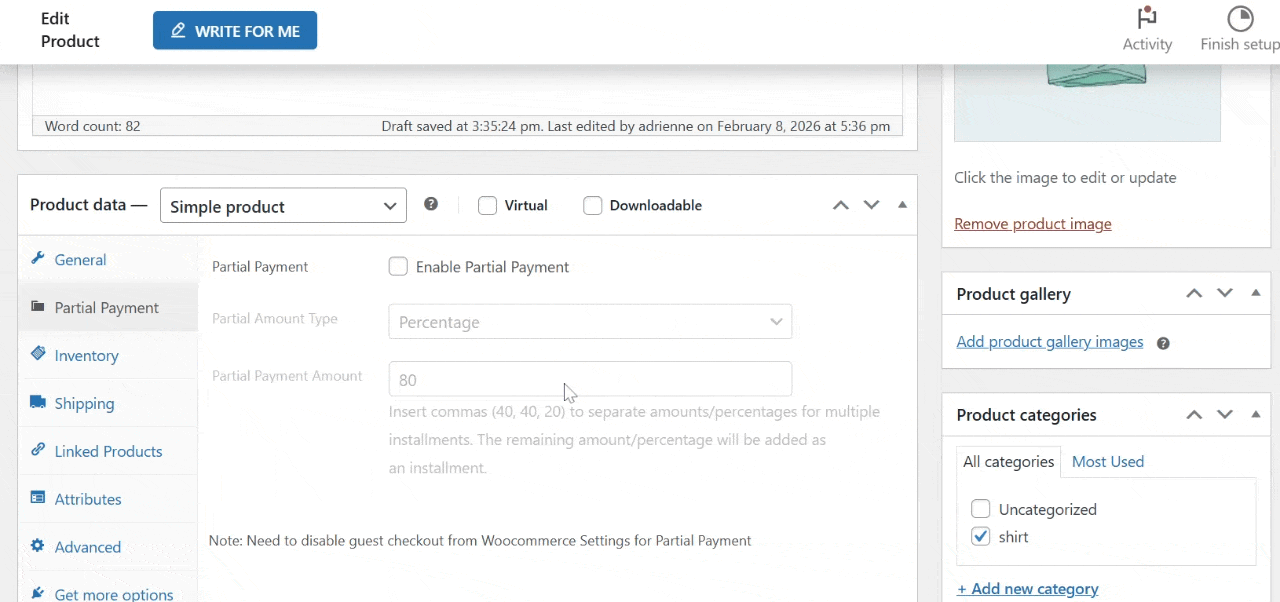
- Hit Opdatering.
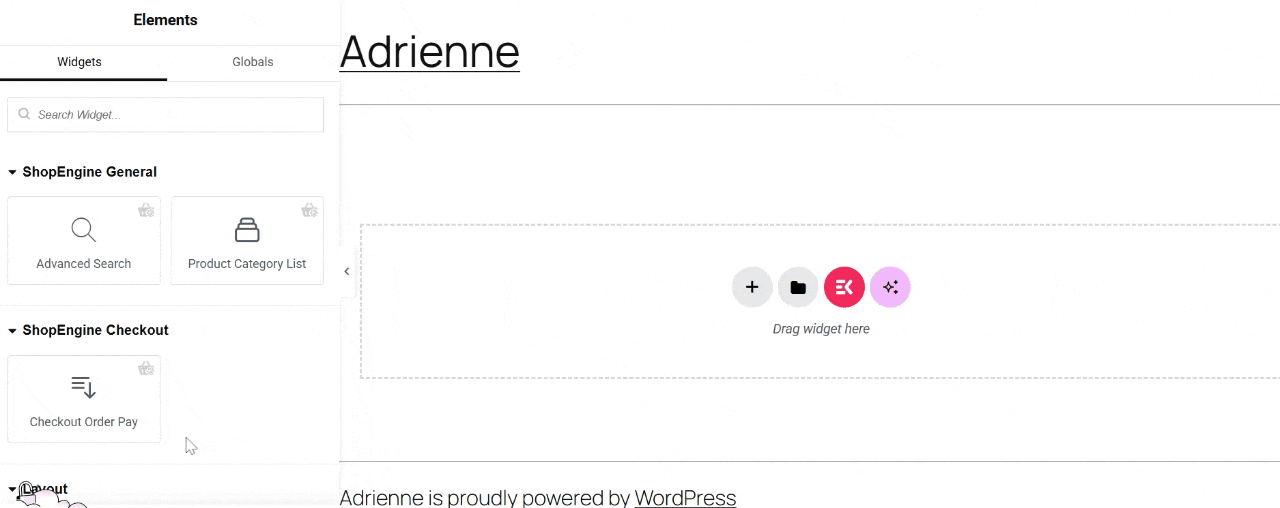
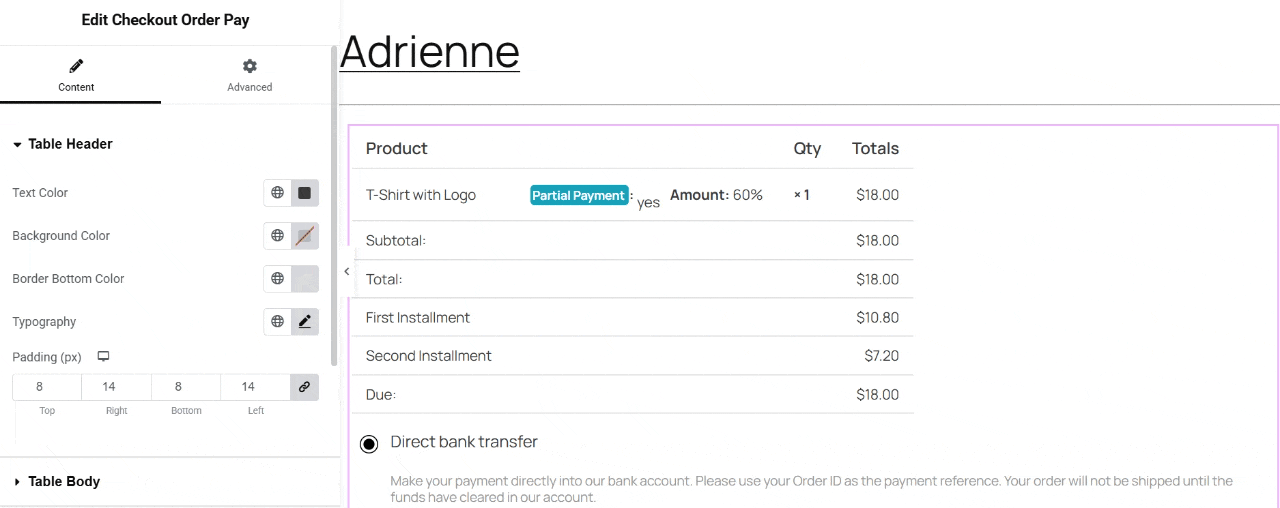
Step 4: Create a Template for Due Payment
When a customer is ready to pay the remaining balance, they need a dedicated page to do so. ShopEngine makes this easy with its Checkout Order Pay skabelon.
- Gå til ShopEngine > Builder Templates > Add New.
- Name: “Due Payment Page”.
- Type: Vælg Checkout Order Pay.
- Set Default: Toggle to Ja.
- Klik Edit with Elementor.
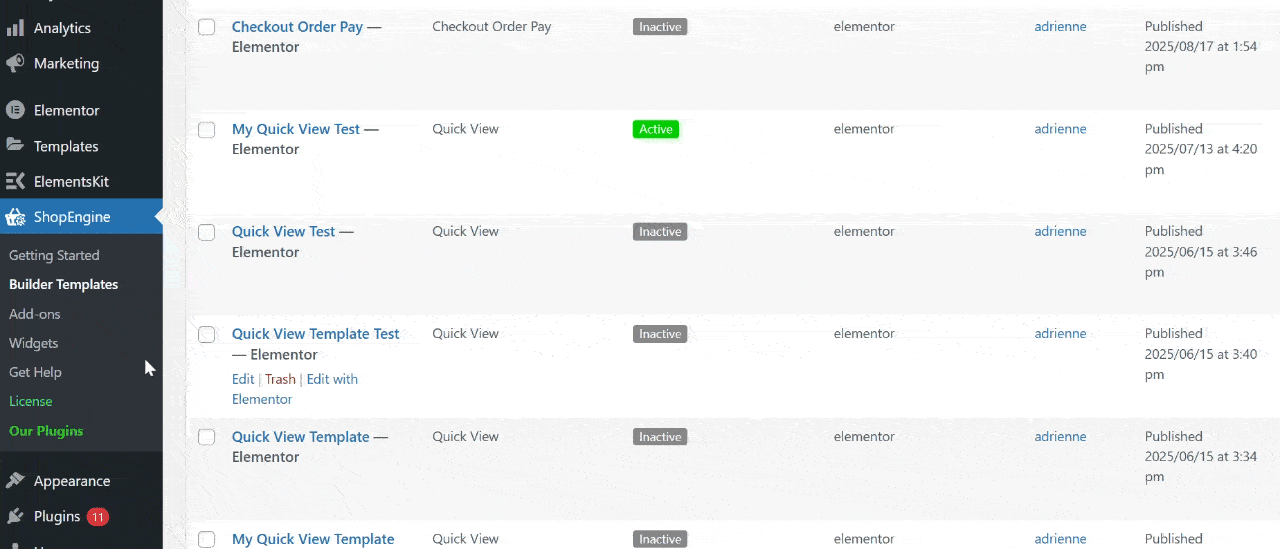
- In the Elementor editor, drag and drop the Checkout Order Pay widget onto the canvas.
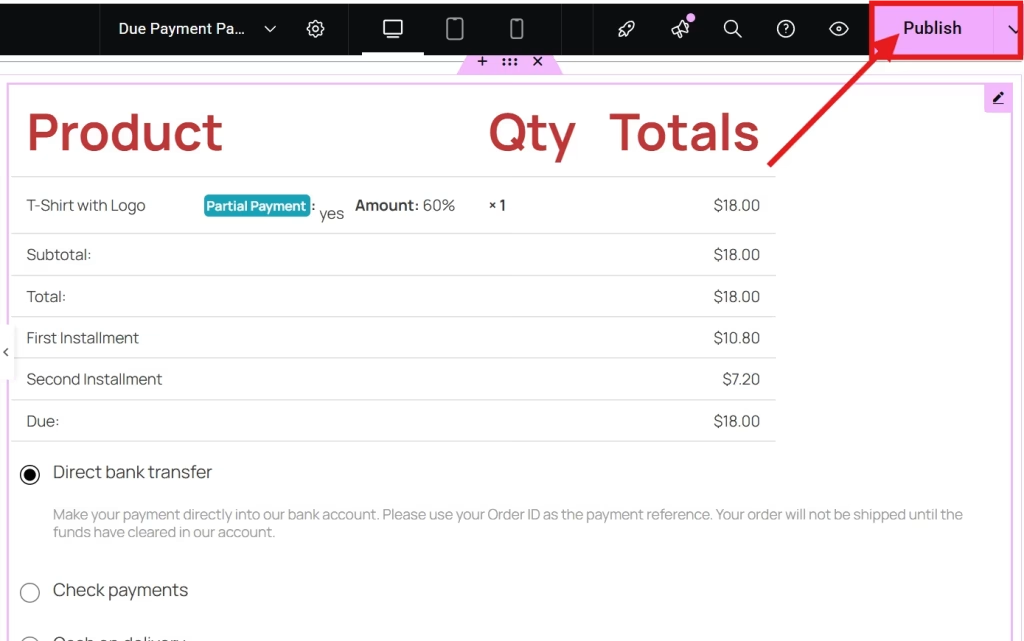
7. Customize the style to match your brand. You can change the typography, adjust the padding, and adjust the color of the text, background, label, etc.
8. Once satisfied, click Offentliggøre.
Step 5: Check if the Partial Payment Works
Always test the user journey before going live:
- Open your site in an incognito window and visit the product page.
- You should now see two options: Full Payment og Partial Payment.
- Vælg Partial Payment and proceed to checkout.
- Verify that the “Amount to Pay Now” reflects the deposit and that the “Due Amount” is listed correctly.
- Complete the test order and check My Account > Orders to ensure the “Pay Due” button appears for that order.
Ofte stillede spørgsmål
1. Does WooCommerce Support Partial Payments by Default?
No, standard WooCommerce only supports full payments. You need a plugin or a dedicated “Deposits” addon to enable this functionality.
2. Can You Set Different Deposit Amounts for Different Products?
Yes. As shown in Step 3, you can override the global settings on a per-product basis to offer unique payment plans.
3. What Happens If a Customer Forgets to Pay the Balance?
WooCommerce tools include an automated email notification system. You can set the number of days after the initial purchase for the system to send a friendly reminder with a direct link to the “Due Payment” page.
4. Is It Compatible with All Payment Gateways?
Most standard gateways (Stripe, PayPal, Bank Transfer) work perfectly. However, it is always best to run a test transaction to ensure your specific gateway handles the “Order Pay” redirect correctly.
5. Can Customers Pay the Remaining Balance from Their Account Page?
Yes. After placing a partial payment order, customers can go to My Account > Orders and click the Pay Due button to complete the remaining payment.

Konklusion
One that surely increases conversion in your WooCommerce store is to offer WooCommerce payment plans. It encourages visitors to make a purchase because of flexible payment options. Not only that, but it also increases your sales because customers will have a chance to make multiple purchases.
With the right tool, you can introduce flexible Woocommerce installment payments without writing a single line of code. With just a few clicks, you’ll provide a smoother shopping experience that builds trust, improves cash flow, and keeps your customers coming back.
Follow this guide, implement it correctly, and you can offer a flexible, competitive, and customer-friendly online store.